Self isolation, quarantine and work from home policies resulted in the enormous increase in demand for video conferencing apps.
Business conferencing apps show record growth of more than 62 million downloads in March, according to a report from App Annie and TechCrunch.
Zoom, Skype are one of the most popular video conferencing tools, but customers claim issues about security and personal data.
Self hosting a Rocket.Chat server is an excellent alternative in such a case, stating itself as a communication hub that facilitates team collaboration and organizes conversations. With Rocket.Chat customers can choose how they will communicate:
- by chat
- video conference
- audio messaging
- file sharing
- or other omnichannel tools.
The main functionality includes:
- Unlimited users, channels and messages
- Free audio and video conferencing, guest access, screen sharing and file sharing
- A secure workspace with username restriction and additional controls for admins
- Complete access to the source code for customization or extension with new functionality
- Real-time chat widgets for providing high quality customer service
- Instant translation of message to over 50 languages
- Available as web, desktop and mobile applications
- Integration with various applications: Jitsi (by the way Jitsi one-click install is also available at Cloudlets.com.au), Jira, GitHub, Google Calendar, LDAP, etc.
- Wide community support
What is important, the app is open source, free and secure. So that you can access the source code, customize it, extend or add new functionality as well as get it secured by hosting your own Rocket.Chat server in Australia at Cloudlets.com.au.
And today we’ll share how to install the Rocket.Chat server within a single click at Australian cloud hosting provider Cloudlets.com.au, set up a custom domain, secure the app with SSL certificate and start using the app.
Rocket.Chat Installation
In the previous article we’ve already shared how to register at Cloudlets.com.au, so you can easily follow those steps or just go to Get Started page and start your free trial.
Now you have to log in to the dashboard with your credentials.
Then open Marketplace.
Now choose Rocket.Chat within Dev & Admin Tools and install it.
Name your Rocket.Chat environment and click the Install button.
As soon as your environment is ready, you will receive an confirmation email.
As well as you will see the pop up that application is successfully deployed.
Now you can click Open in Browser button to start using the application.
NOTE: The pre-packaged environment topology includes prebuilt Docker containers of Rocket.Chat application and NoSQL database MongoDB.
And in order to use it in production we’ll need to set up a custom domain and traffic encryption with valid SSL certificate.
Bind Custom Domain and Trusted SSL Certificate
Rocket.Chat documentation requires you to bind a custom domain and terminate SSL certificate. So let’s perform it within the several easy steps.
- First, you’ll need to add a load balancer, - so just hover over the corresponding icon within the Cloudlets dashboard and press Change environment topology.
Within the opened topology wizard Choose the load balancer node e.g. NGINX by clicking on Docker Image > NGINX > [choose the version you prefer].
2. Then you need to attach a Public IP address to the load balancer node (due to Let’s Encrypt Free SSL Add-On requirements) as it shown in the screen below, and click Apply.
3. Create A record for your custom domain at your registrar using the attached public IP address. Hover over the external IP within the load balancer node and click Copy to Clipboard.
For this step-by-step Rocket.Chat installation guide I’ve created a domain cloudlets.pp.ua (and you can choose any domain registrar).
4. And the next step is to bind the custom domain and generate a trusted Let’s Encrypt Free SSL certificate using Jelastic PaaS add-on. To do this, just click on the load balancer’s Add-Ons button.
5. Choose Let’s Encrypt Free SSL Add-On and press Install.
6. Fill in the External Domain field with your custom domain name and proceed to the add-on installation. The trusted SSL certificate will be automatically generated and installed on the load balancer node.
After the certificate is installed, your connection to the server becomes secure and you can access it using your custom domain name via https protocol.
Rocket.Chat Configuration
Now let’s set up the Rocket.Chat.
1. Enter the basic Admin Info.
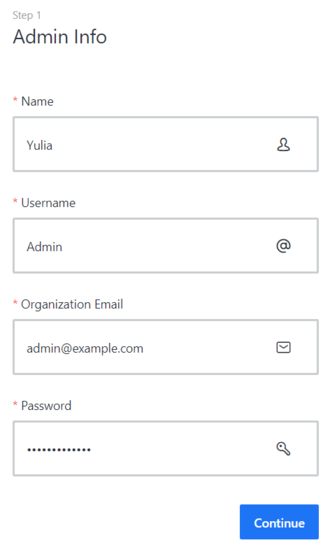
2. Provide general information about your organization.
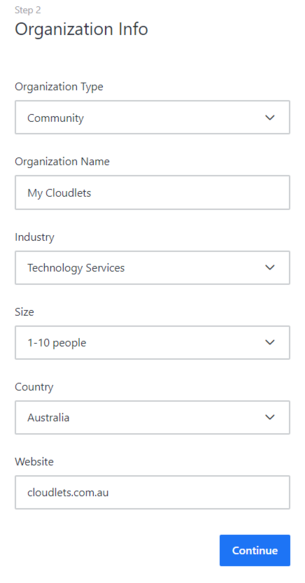
3. Define chat Server Info.
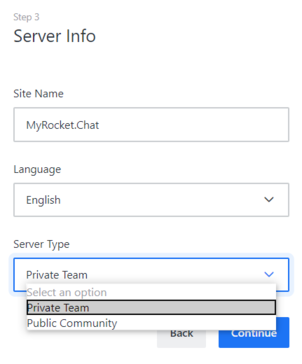
4. Register the server - choose the required option and agree with the Terms & Privacy Policy.
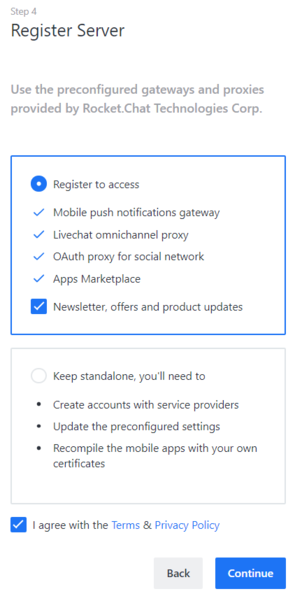
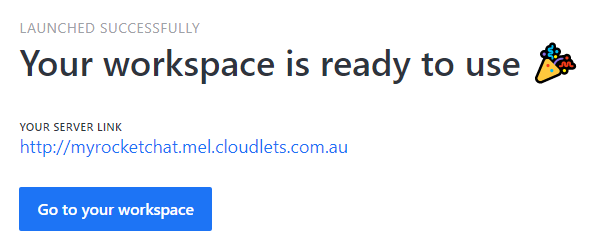
5. Click the Go to your workspace button which leads to the custom domain via encrypted connection e.g.http://myrocketchat.mel.cloudlets.com.au/.
6. Now let’s open the Administration panel of your workspace. Here you can add users and set up the required configurations.
To add new user, just click the + on the right within the admin panel, and fill in all the fields.
NOTE: For mobile access, use the same Rocket.Chat custom domain URL.
Now you have successfully set up your Rocket.Chat to communicate and collaborate with your team, share files, chat in real time or switch to video/audio conferencing.
Try it out on your own, following the steps from our how-to installation guide - just register for free trial at Cloudlets.com.au.
