This how to article is aimed to lead you through the Node.js installation, management, and scaling in the Australian cloud hosting platform.
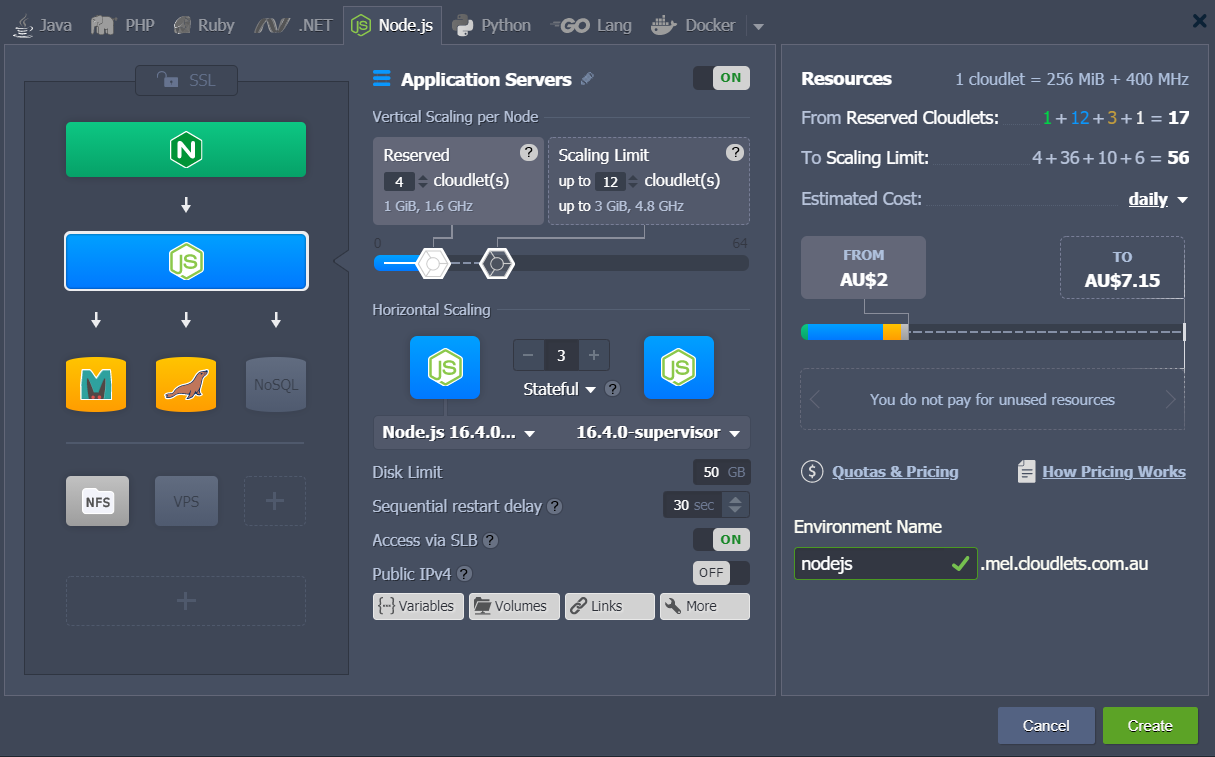
So firstly let’s set up your environment via Topology Wizard: switch to the Node.js tab, select the engine version, choose SQL or NoSQL database, specify disk limit, set up IPv4 if needed and specify vertical and horizontal auto scaling.
Before creating your environment, you can preview the estimated costs for hosting (hourly, daily, monthly rate) as well as check the cost in lowest and highest app load.
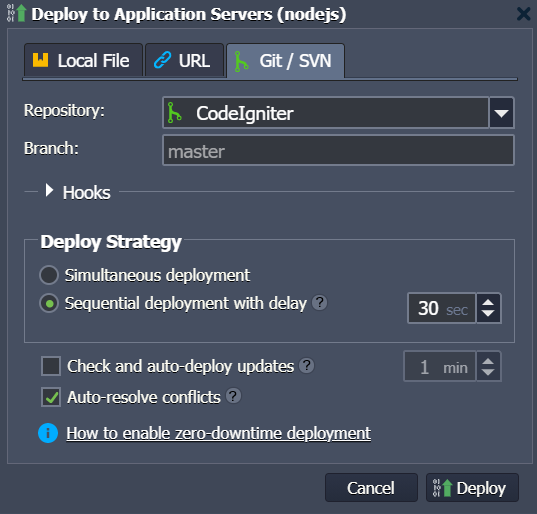
Deploy Node.js Application
Within the Cloudlets Platform the deployment process is automated using:
- application archive uploaded from the local machine or via external URL
- remote VCS repository (e.g. GitHub)
Node.js Package and Process Managers
Each NodeJS application server contains a built-in development tool that provides automation of the installation, update, configuration, and removal processes.
The platform provides two types of package managers:
- npm - manages your project requirements by installing the additional modules, packages, and ready-to-use applications
- yarn - operates the same requirements as in npm providing higher speed, reliability, and convenience
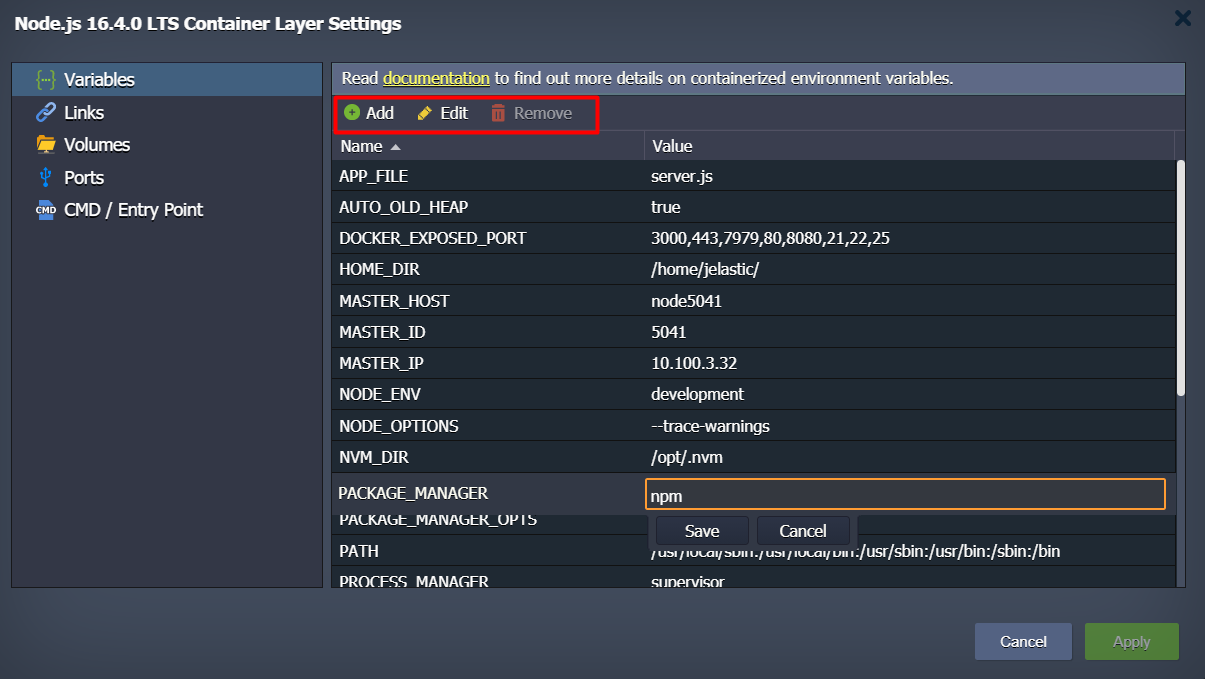
Process Managers helps to control your app lifecycle, monitor running services and maintain operability:
- npm - initiates and configures multiple processes
- pm2 - provides variety of management and process monitoring features
- forever - enables continuous running of your Node.js processes with an automatic restart in case of failure
- supervisor - monitors running apps and automatically restarts to keep them updated.
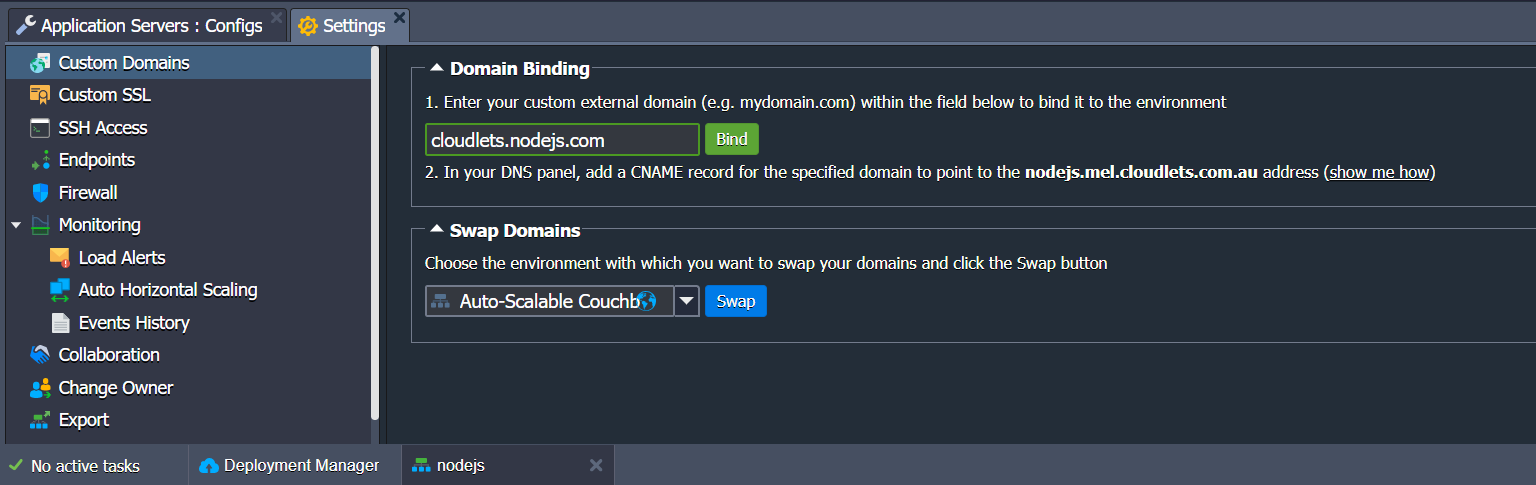
Node.js Domain Management
Whilst the environment creation your Node.js application receives the default domain name, which can be easily changed for the custom one. You can set it up choosing one of the available options:
- CNAME redirect for dev and test environments
- DNS A Record for production environments
Cloudlets also provides a possibility to smoothly switch traffic between your environments without downtime via swap domains functionality.
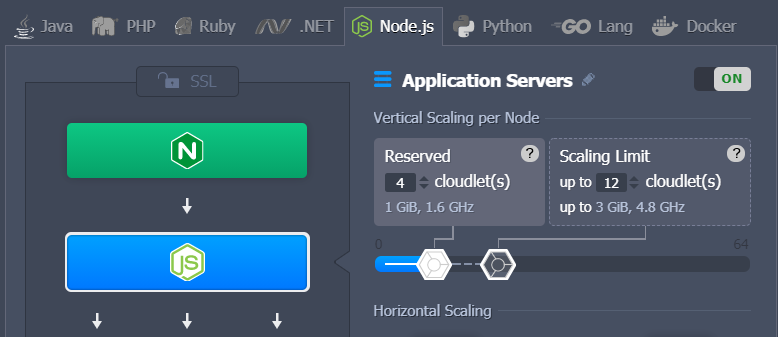
Automatic Vertical Scaling
Due to the automatic resources allocation, required for your application's high performance and availability, you don’t need to overpay for unused or extra resources. Win-win auto scaling saves your time, eliminating the need to handle the load-related adjustments or complicated architectural changes.
To benefit to the fullest from auto scaling in the cloud, all you have to do is just to set the upper cloudlets limit for your NodeJS application server and everything else will be handled by platform.
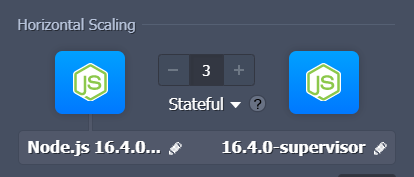
Manual Horizontal Scaling
In order to scale in or out your NodeJS app server, just set the number of nodes within the Horizontal Scaling section in the topology wizard. You can also adjust the scaling mode:
- Stateless scaling is a simultaneous creation of nodes from the base image template
- Stateful scaling is a sequential creation of new nodes with file system and all custom configurations copied from the initial master container
Automatic Horizontal Scaling
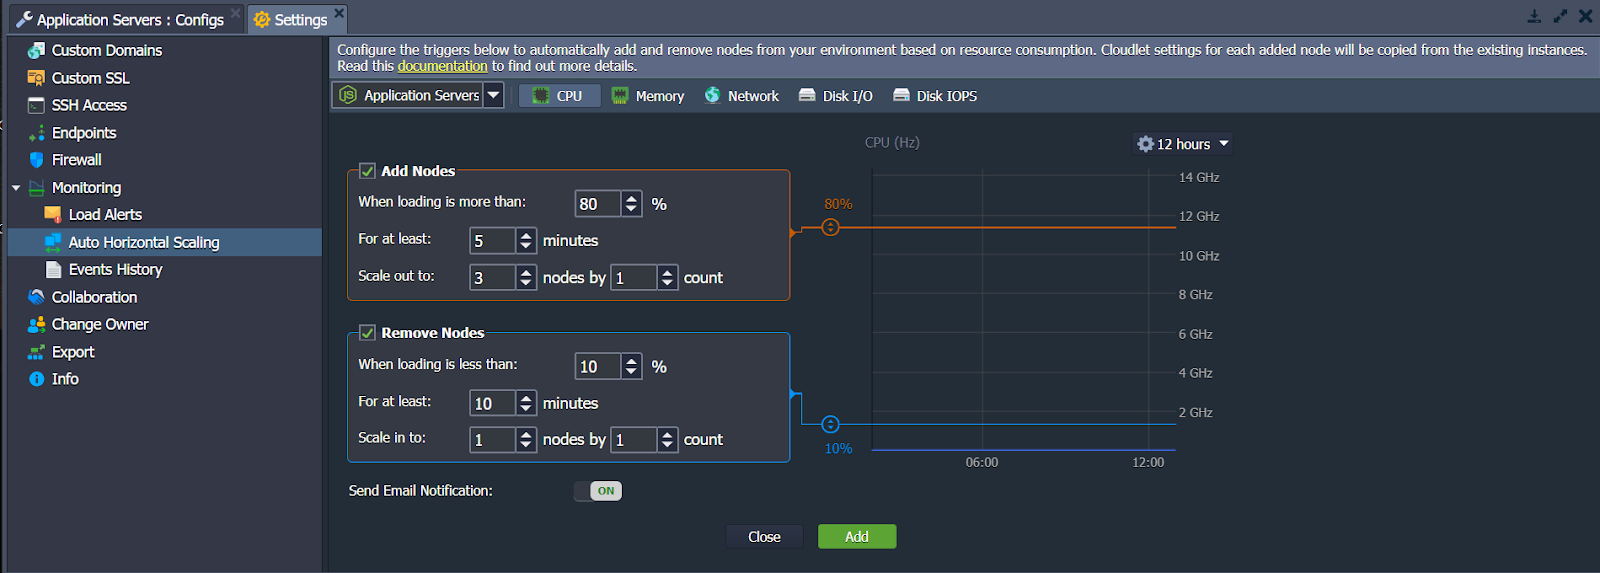
In order to set up the automatic increase or decrease the number of nodes due to your Node.js application load, you have to click the environment Settings, then select Monitoring and choose Auto Horizontal Scaling section.
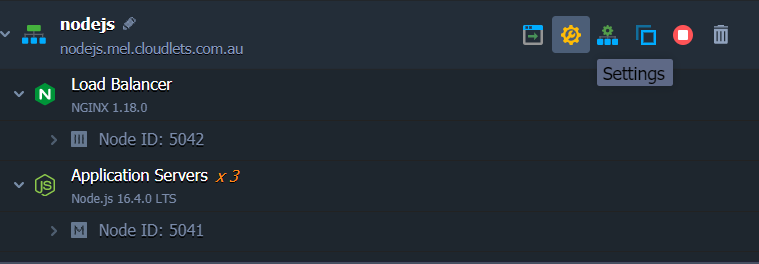
And now you can easily configure the scaling condition.
Now you are aware of the main peculiarities of Node.js cloud hosting within the Australian-based platform Cloudlets.
Create or import your own environment for free - register at cloudlets.com.au and test drive the platform.