Cloud hosting appears to be one of the most cost-effective solutions as for static so for dynamic project workloads, but still there is a chance to face a wasteful cloud resources utilization. The self-estimated waste can be from 30% to even 70%.
It is possible to decrease the resources waste and optimize the budget with the help of several most popular ways:
- To monitor utilization and rightsizing instances
- To automate hibernation of workloads
- To shut down workloads for a certain hour
- To select cloud hosting provider with a lowest pricing
In this blog post we’ll talk about how to schedule start and stop for workloads automatically and save hosting costs whilst running your projects in the cloud.
Such stages as project’s development or testing doesn’t always require the constant running of the environment. In the image below you can see the approximate waste of cloud resources during 5 working days 10 hours each:
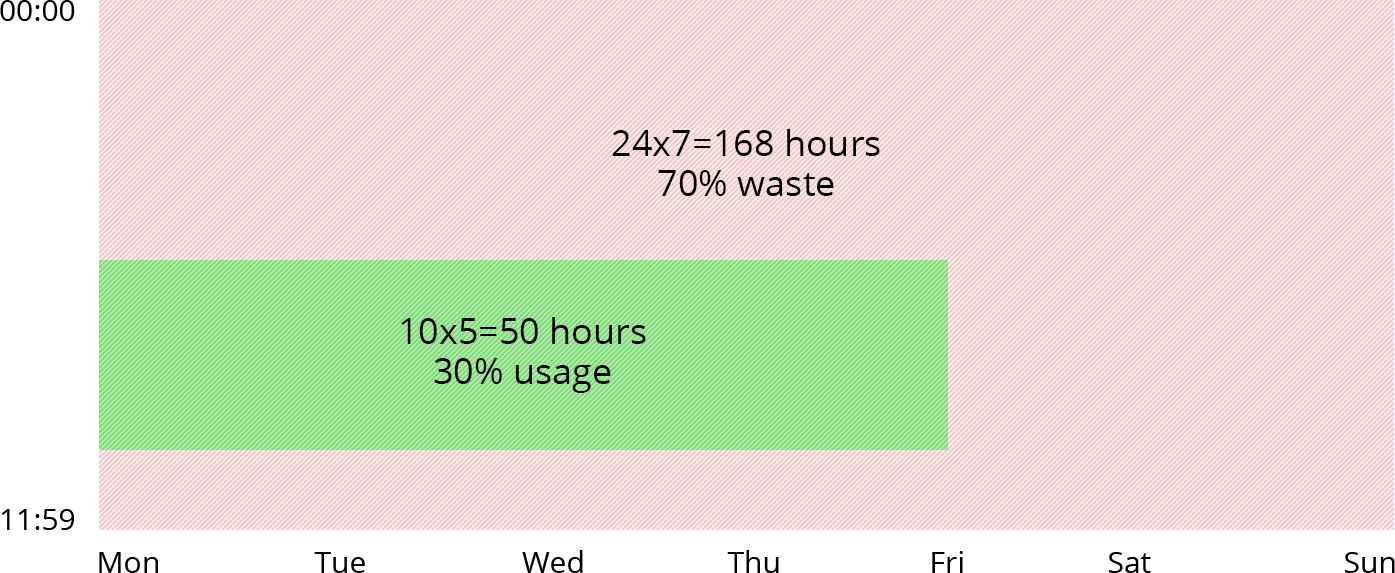
In this case running the project constantly results in about 70% waste of resources. The easiest solution here would be stop and start your project every time you are not working on it. And now we’ll check how to configure it to be done automatically with the help of Env Start/Stop Scheduler add-on. This solution was created especially to help web development companies save hosting costs during running their one or multiple projects in the cloud.
How to Install Hibernation Scheduler in the Cloud
This solution is available within pre-installed package at Cloudlets Australia Marketplace automatically.
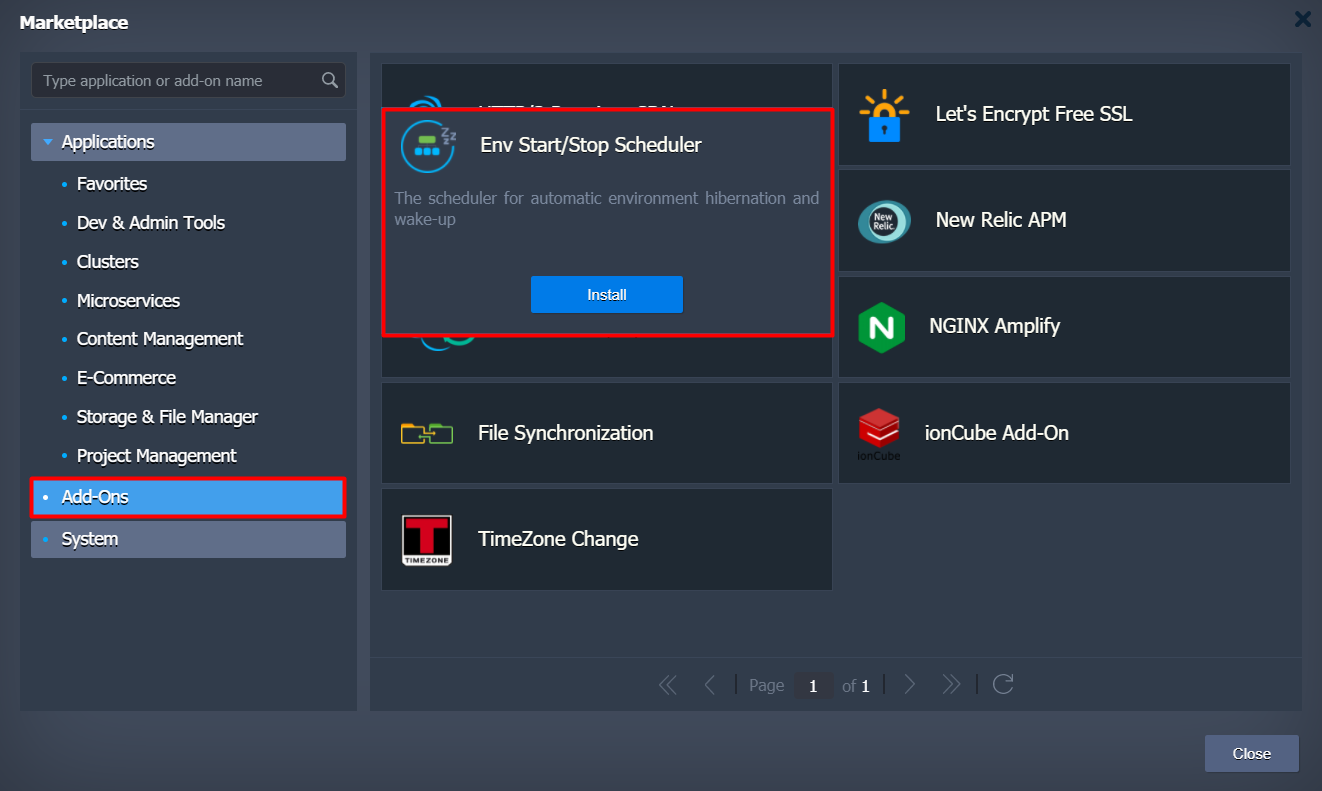
1. Log into the dashboard and click Marketplace in the top.

2. Select Add-ons tab and click the Env Start/Stop Scheduler, click Install.
3. Customise the installation considering your own requirements:
- Specify the time your project should be stopped/started with Stop/Start toggles
- Select days of the week
- Choose the required Time Zone
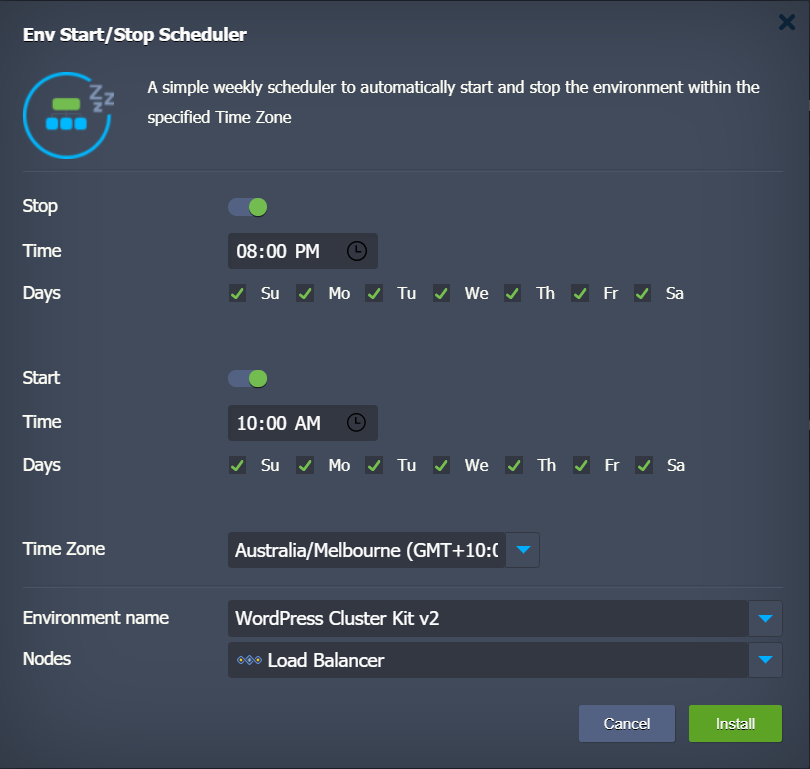
- Environment name - select the environment you would like to manage with the add-on (in our case it is a WordPress Cluster)
- Nodes - select the layer for the add-on to be installed on (it is recommended to leave this field with default choice).
Note that Start/Stop Scheduler can be run on just a single layer at a time.
Click Install.
4. In a couple of seconds your add-on will be running, - you’ll see a notification of successful installation.
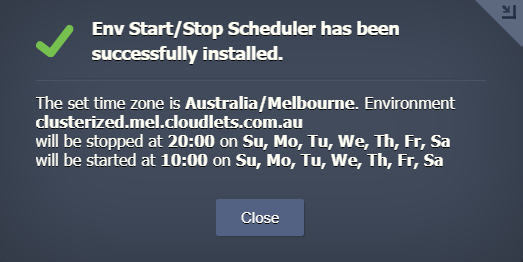
So that’s all - your hibernation add-on will now manage the activity of your project due to the predefined settings.
How to Manage the Hibernation Scheduler
Just in case your needs have changed you can easily customize the start / stop settings via the dashboard:
1. Click the Add-Ons icon next within the correspondent environment layer. Find the scheduler and click Configure.

2. Go on and adjust the start/stop settings - change the time zone, running hours, untick the certain days.
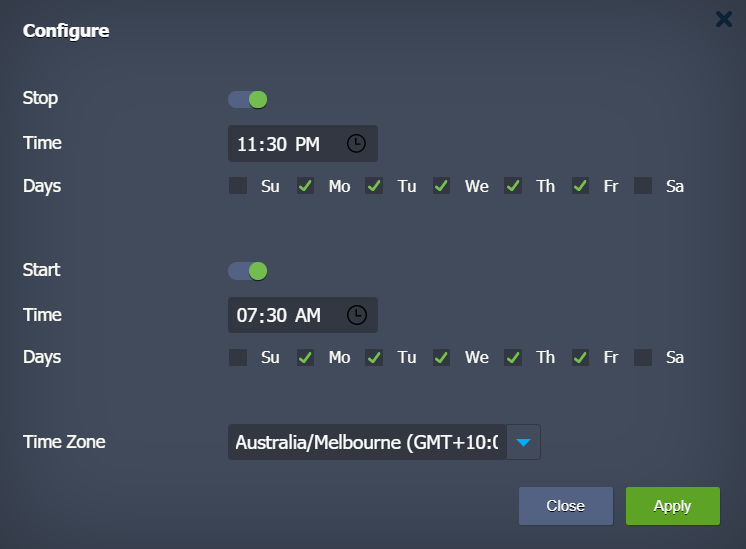
Click Apply.
Note: if you are working on the same environment project with your team via collaboration setting, please discuss the add-on configuration settings with all the collaborators to avoid the double set up cases.
3. After your project is ready for the production, uninstall the Start/Stop Add-on - just click the three lines button at the top right corner of the scheduler configuration to Uninstall it.

And this is all - to try it out just register at cloudlets.com.au and reduce cloud waste during development and testing stages with automatically scheduled hibernation.