Drupal is content management software that celebrates 20 years anniversary. Drupal provides easy content authoring, reliable performance, excellent security, and flexibility for building the versatile, structured content to meet dynamic web experiences.
Within this guide we’ll describe how to easily install Drupal in the cloud using automatic or manual installation within an intuitive UI.
Drupal Automatic Deployment
Sign in (or register free) to the dashboard platform.
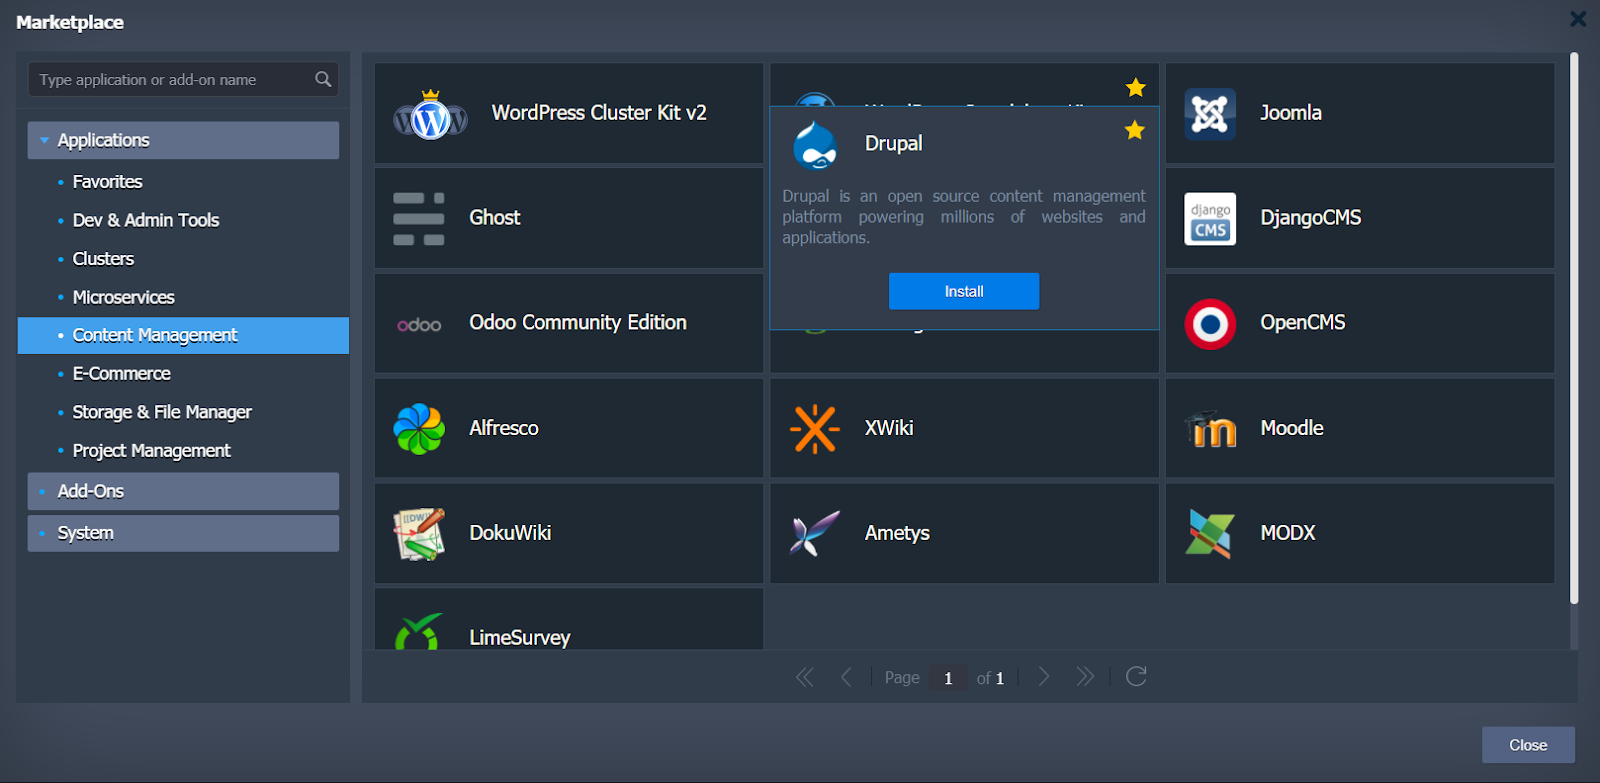
Open the Marketplace and find Drupal within the Content Management section.
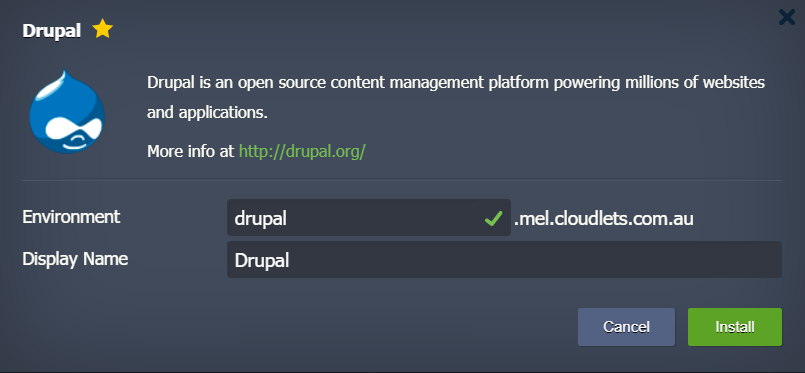
Put the name for your environment and click Install.
In less than a minute a new environment with Apache PHP application server and MySQL CE 5.7 database will be automatically created with the latest Drupal application version.
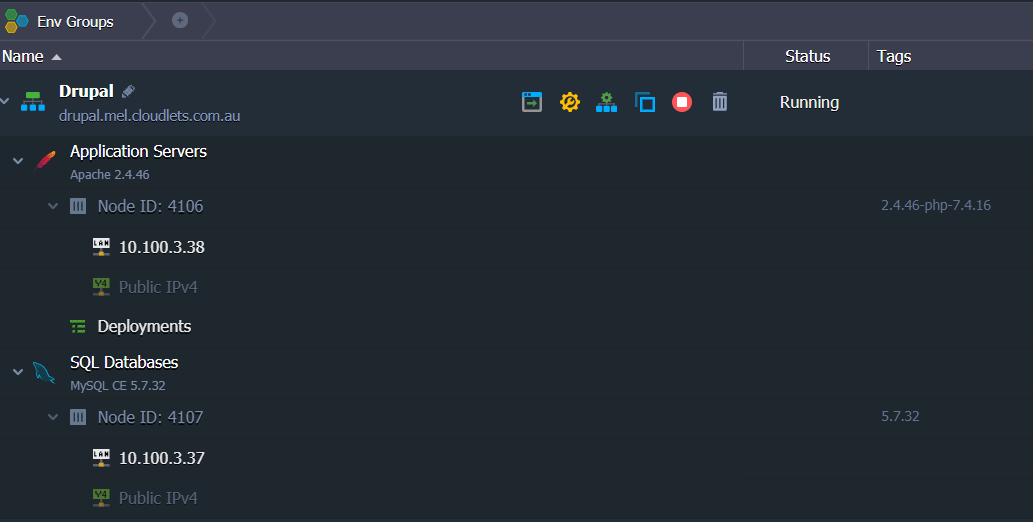
So that’s all, you get your Drupal up and running just in a single button click, automatically.
Drupal Manual Installation
And now let’s check how to get your Drupal CMS application in the cloud via manual installation.
Create an Environment
1. Click the New Environment button at the top left corner.

2. Within the opened topology wizard, switch to the PHP tab and choose the required application server and database stacks (we chose Apache PHP and MySQL here).
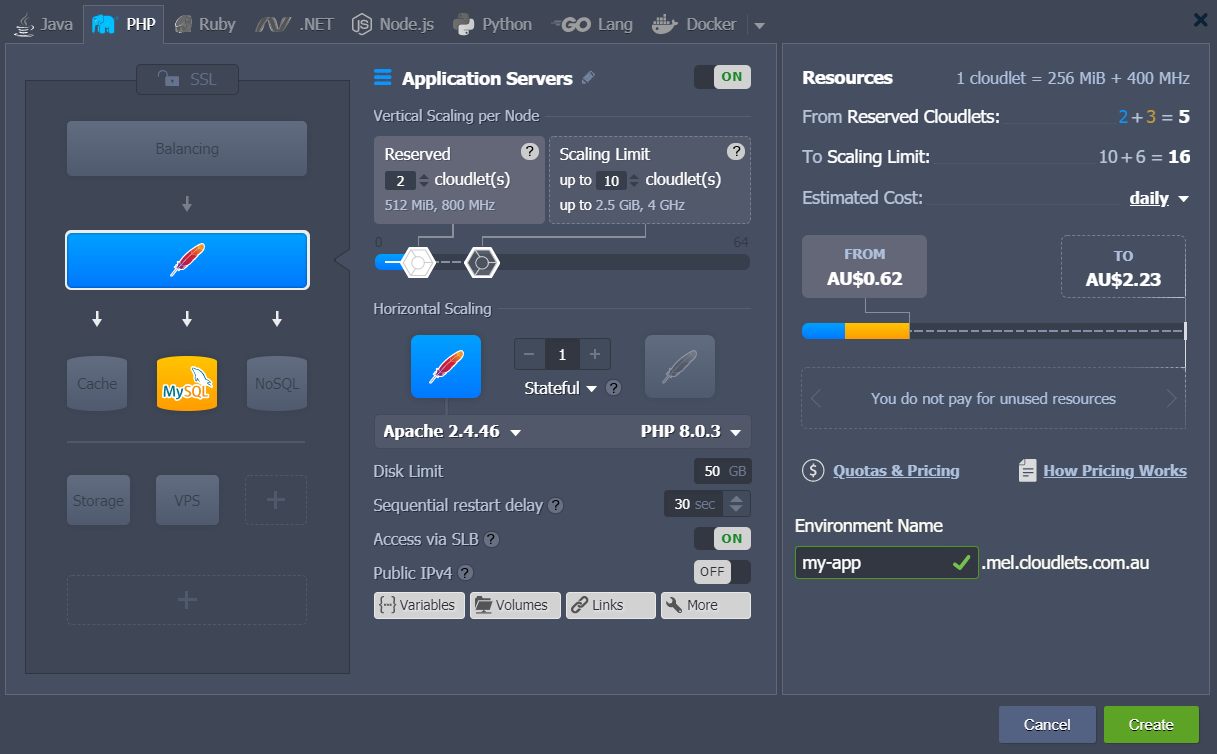
Define the required parameters and click Create.
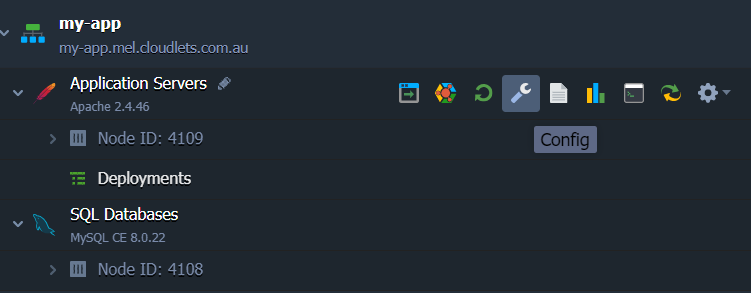
3. Like in the case of automatic deployment, this type of installation will also be up and running in several seconds. After the environment is ready, click the Config button near the application server.
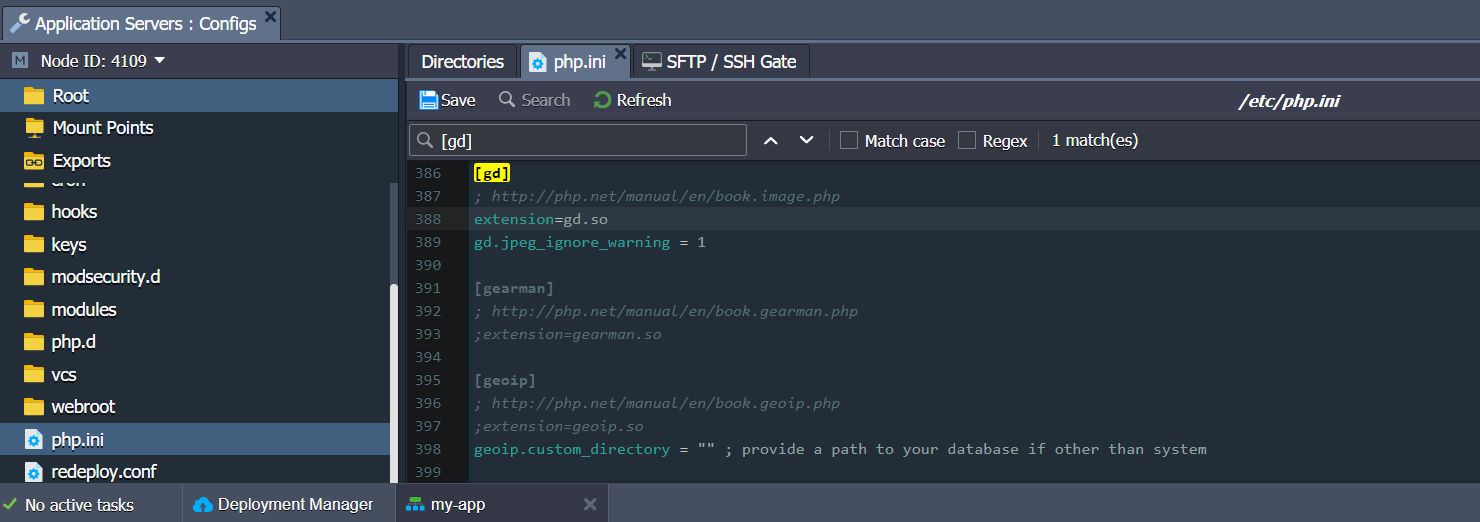
4. To access and edit the file, In the opened configuration file manager, click the php.ini shortcut in Favorites within the opened config manager. Now let’s adjust several PHP modules to support Drupal installation (use the search to quickly locate the required extension):
- enable extension=gd.so and zend_extension=/usr/lib64/php/modules/opcache.so modules by removing semicolons at the beginning of the line
- disable or comment the mbstring.encoding_translation = On setting
5. Save the changes and Restart Nodes for the Apache server to apply them.

Next, create a dedicated database for your Drupal installation.
MySQL Database Configuration
1. Click Open in Browser near the database node (MySQL in our example).

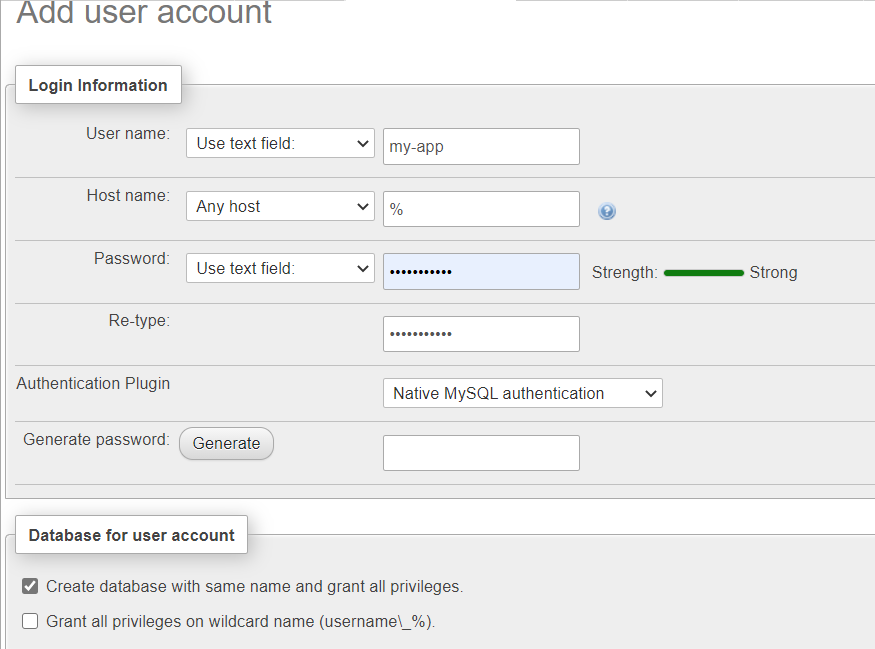
2. Log in to the admin panel using the credentials from the email. Switch to the User accounts tab and click the Add user account link.

3. Within the opened form, provide User name and Password. Tick the Create database with the same name and grant all privileges check-box. Click Go.
Now let’s deploy the Drupal package.
Drupal Deployment and Installation
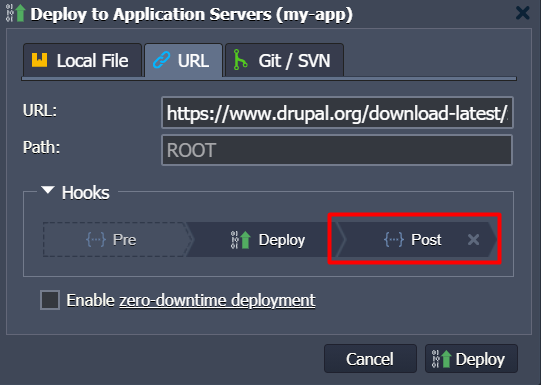
1. You can get the latest version of Drupal app package at the official Drupal web-site or deploy it via the direct link: https://www.drupal.org/download-latest/zip
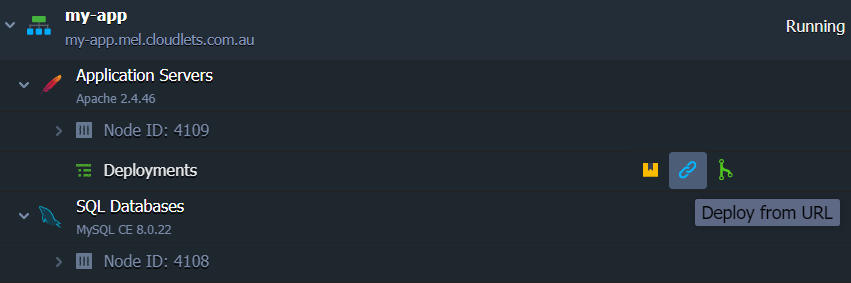
2. Now let’s use the Composer tool (pre-installed for both Apache and NGINX PHP servers) via the Post deployment hook in order to automatically resolve the required dependencies for your project:
cd $WEBROOT/{project_name}
composer install
Replace the {project_name} in code with the context (Path) you’ve set for the project (ROOT by default).
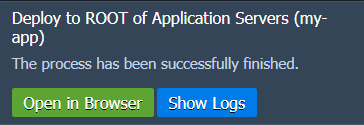
3. Open in Browser your application after the package is deployed.
4. Now let’s move to the installation process. Choose an installation language and profile, then provide the database connection details:
- Database type - choose the appropriate database (MySQL/MariaDB, PostgreSQL or SQLite)
- Database name, Database Username, Database Password - type the credentials, you've used for the database creation in the Configure Database section of this guide
- Advanced Options > Host - link to your database without the protocol part (this data can be found in the appropriate email)
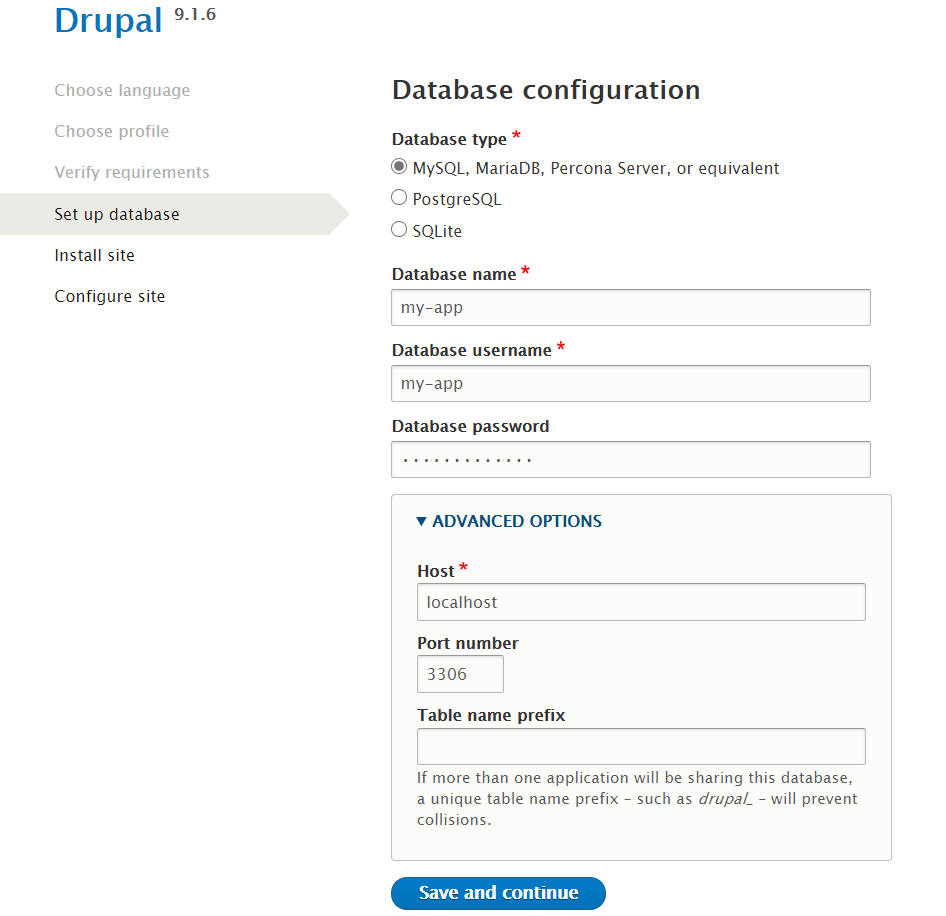
Click Save and continue button to proceed to the automatic installation of the Drupal CMS.
5. Provide your site information (site name, email, admin login/password, etc). Click Save and continue and you will be redirected to the front page of your new site.
Try out to deploy auto scalable Drupal for large enterprise projects with high traffic - simply register at https://www.cloudlets.com.au/ and test drive the platform for free.