In this article, we'll unveil how to install the Ruby environment in the cloud and briefly describe the main Ruby-related possibilities within Cloudlets.
Ruby Environment Installation and Hosting
Let’s check how to set up the hosting of your Ruby environment within the intuitive topology wizard. So, firstly let’s log in to the dashboard (or register free).
Click New Environment

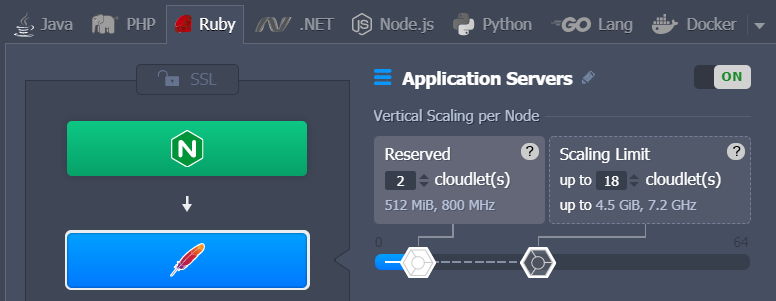
Switch to the Ruby language tab, select the required application server and engine version, add any other software stack required.
You can also adjust other parameters, such as cloudlets (RAM and CPU), disk space, Public IPv4/IPv6, node count, etc.
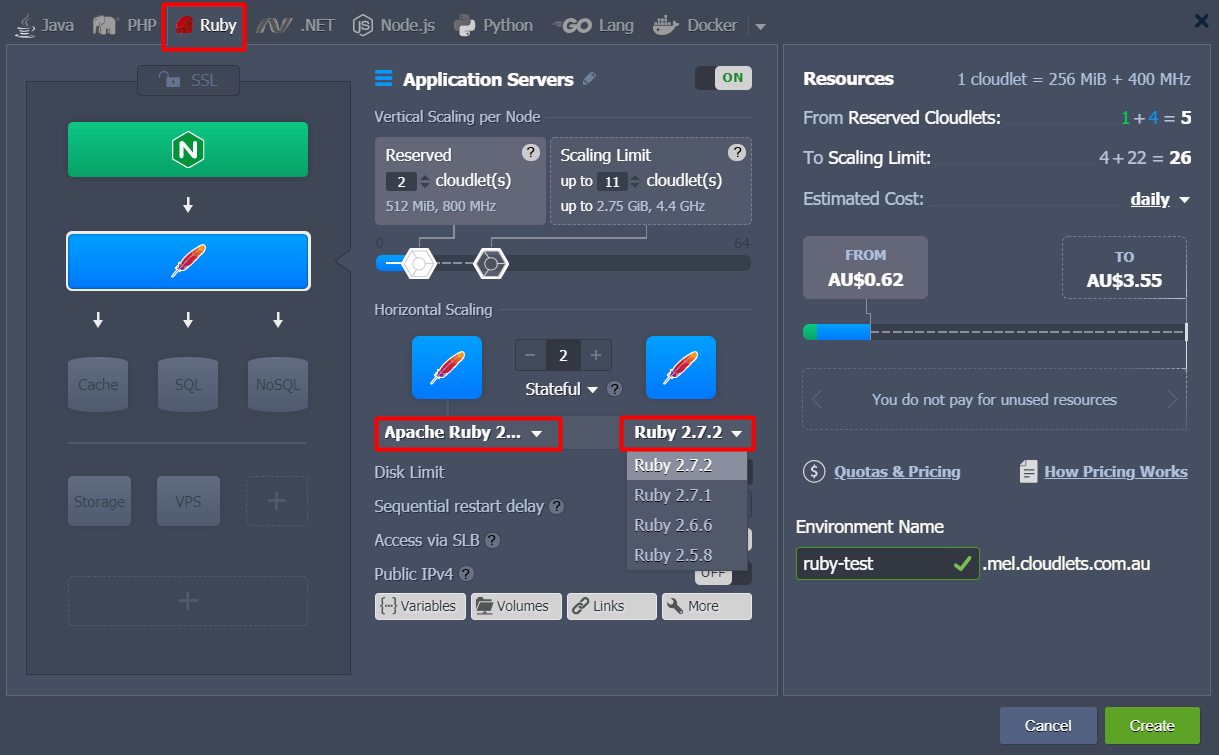
Click Create and in a couple of minutes your applications will be up and running!
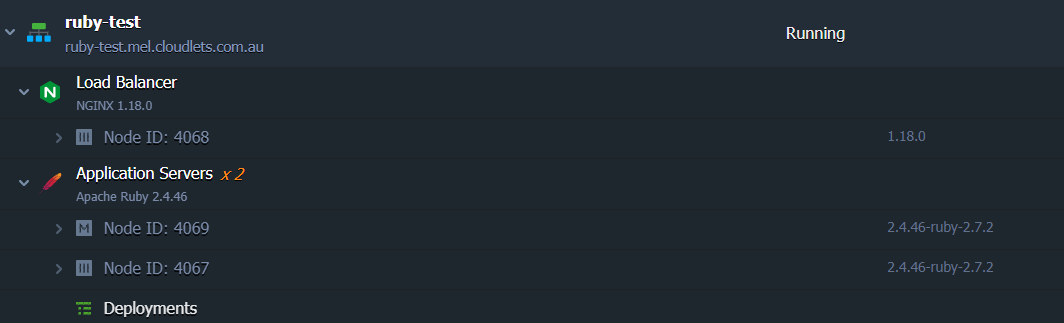
Ruby Application Servers
Cloudlets platform provides Ruby application servers based on the Apache and NGINX software stacks, configured to utilize the Ruby on Rails framework for implementing web applications and the Passenger application server by default.
If required, you can easily configure the NGINX Ruby stack to work with different inbuilt servers, such as Passenger, Puma, and Unicorn.
Ruby Versioning
You can select the required version of Ruby during the environment creation or adjust it for the running instances via container redeployment:
- 2.5.8
- 2.6.6
- 2.7.1
- 2.7.2
Ruby Application Deployment
The platform automates the deployment process for the managed Apache Ruby and NGINX Ruby application servers using:
- application archive uploaded from the local machine or via external URL
- remote VCS repository (e.g. GitHub)
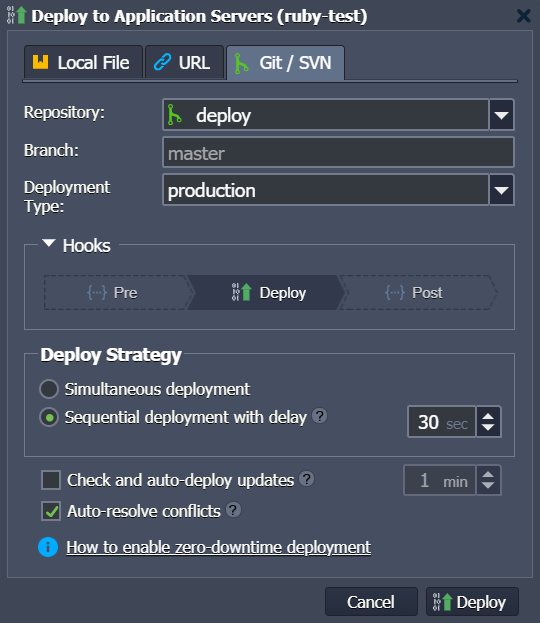
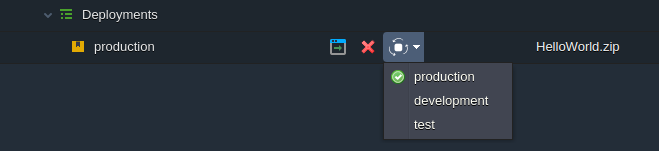
When deploying a Ruby application, only a single context (ROOT) can be used. You can also select from three Deployment Types (i.e. RAILS_ENV) for it:
- development - reloads all application classes and turns off caching (allows a faster development cycle)
- production - turns on all caching
- test - wipes out database between test runs
If needed, you can switch between the Ruby deployment types via the appropriate drop-down list next to your application.
Ruby Dependency Management
Ruby instances within Cloudlets are provided with the Bundler dependency manager, so that you can automatically track and install the required gems and versions. In case your project has a Gemfile file in the root folder, it will automatically resolve dependencies with Bundler after deployment to the server, so that you wouldn't have to perform any manual intervention.
You can also include any Ruby framework into your Gemfile or utilize Ruby on Rails, which is available by default.
Domains Management
You can easily set a custom domain name for your Ruby application instead of the default one. Based on the environment topology, you should use:
- CNAME redirect in case of using the Shared Load Balancer (for dev and test environments)
- DNS A Record if using Public IP(for production environments)
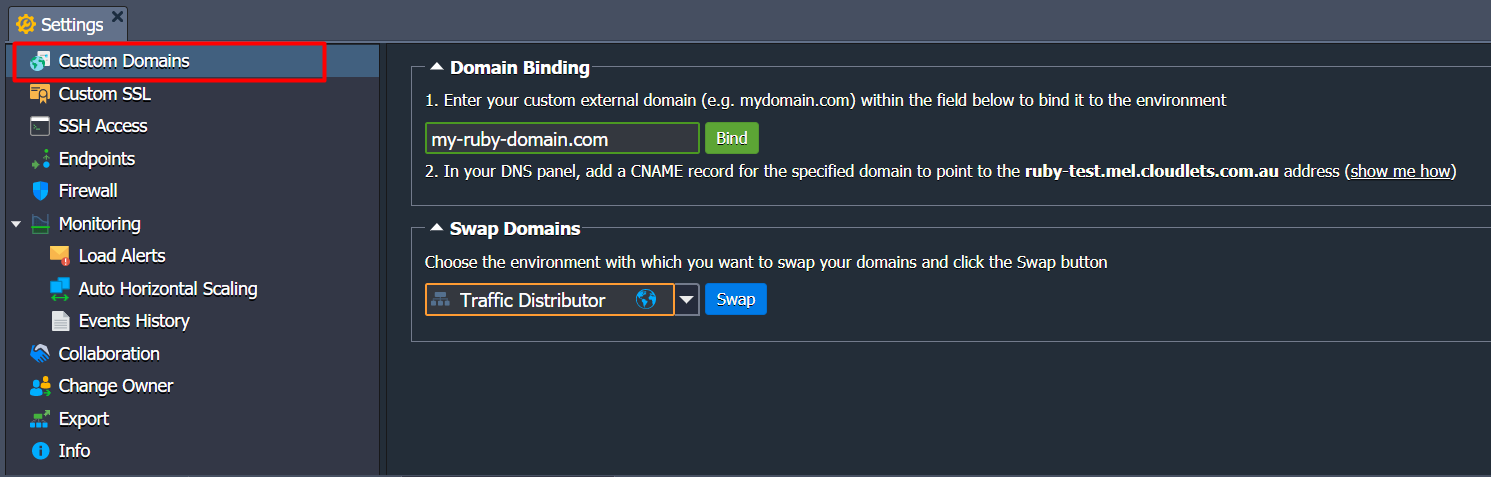
You can switch traffic from one environment to another without downtime via Swap domains functionality (Settings > Custom Domains > Swap Domains).
Vertical Auto Scaling
To set up auto scaling for your Ruby server, just define the required cloudlets limit (128 MiB of RAM and 400 MHz of CPU each), and all the rest will be performed by the platform automatically.
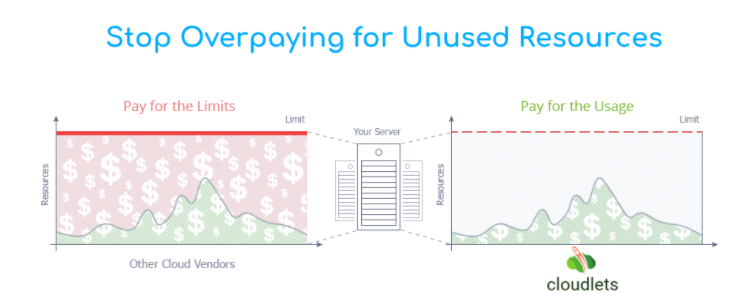
Setting up the vertical scaling, you don’t have to worry about the performance of your Ruby apps anymore as well as overpay for hosting. Pay per use approach helps not only save your money, but also saves your time eliminating the need to handle the load-related adjustments or perform architectural changes manually.
Horizontal Scaling: Manual
In order to scale nodes manually within the platform, - refer to the corresponding section in the topology wizard.

You can also choose between two scaling modes - Stateless (simultaneously creates all new nodes from the base image template) and Stateful (sequentially copies file system of the master container into the new nodes).
Automatic Horizontal Scaling
Cloudlets provides a possibility to configure automatic horizontal scaling for Ruby environments through tunable triggers, which monitor the changes in the nodes load and increase or decrease their number.
To set it up, access the environment Settings > Monitoring > Auto Horizontal Scaling section, define the layer (Load Balancer, Application Server) and resource to be monitored (CPU, RAM, Network, Disk I/O, Disk IOPS).
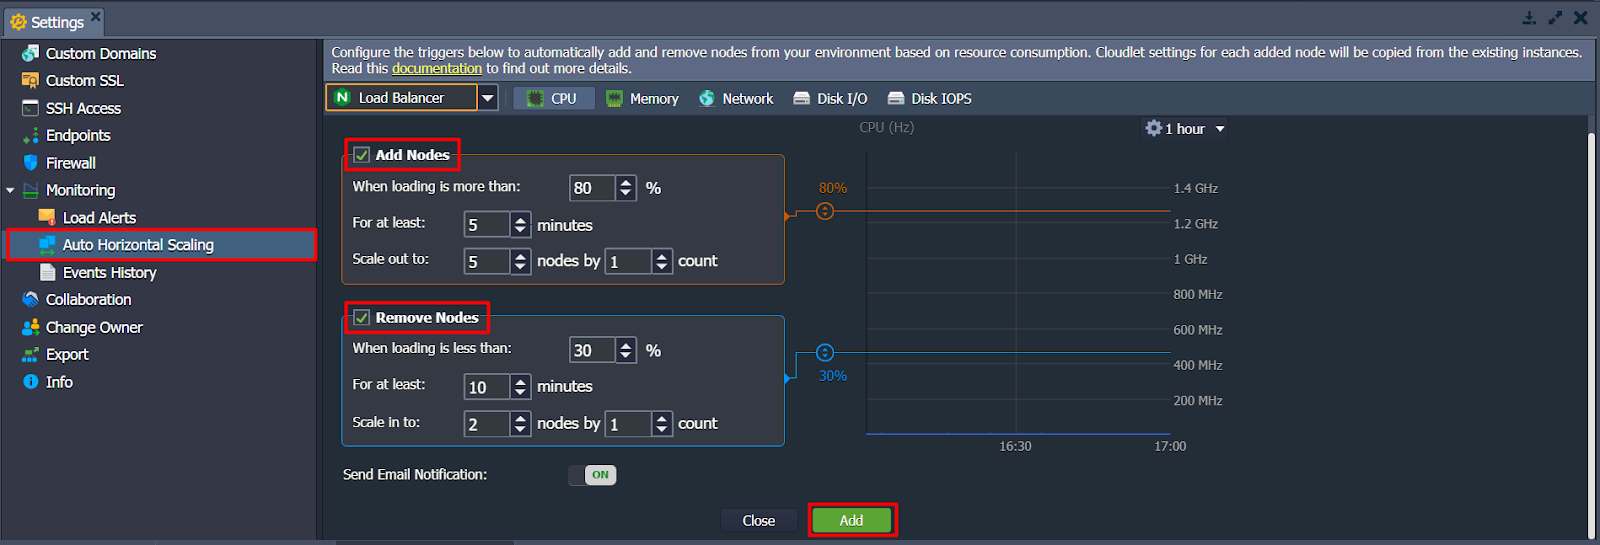
Set the exact condition and specifics of scaling
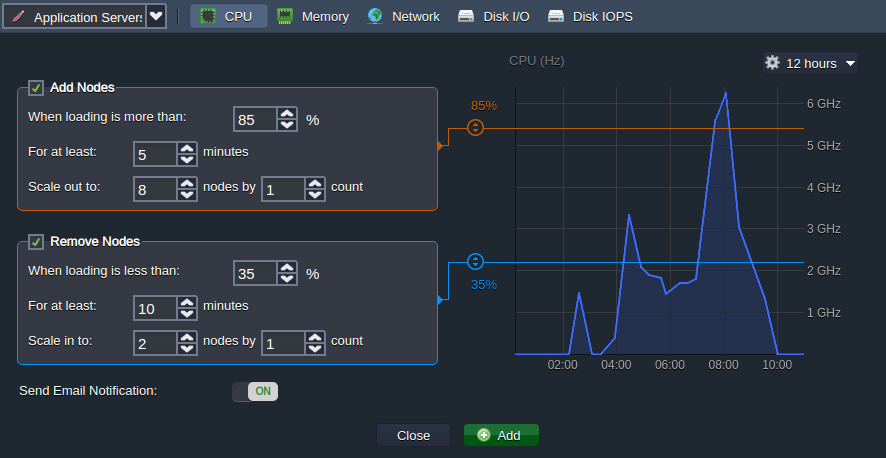
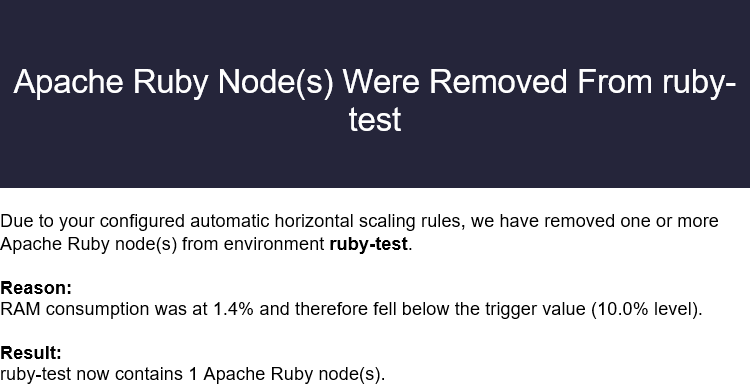
Everytime the application load is changed, the platform will automatically add or remove nodes within your settings, sending you the corresponding email notifications.
That’s all - now you are aware of the main peculiarities of Ruby cloud hosting at Australian platform Cloudlets.com.au.
To try out the unparalleled performance, enjoy auto scaling and cost efficiency, - just register for a free trial.