
In the previous article we covered the necessity of running Clusterized WordPress solutions over the standalone ones. And now we’ll unveil how to automatically install this enterprise level cluster in one single click at Cloudlets.com.au hosting platform.
Installing Auto Scalable WordPress Cluster
- Log in or register at Cloudlets Dashboard
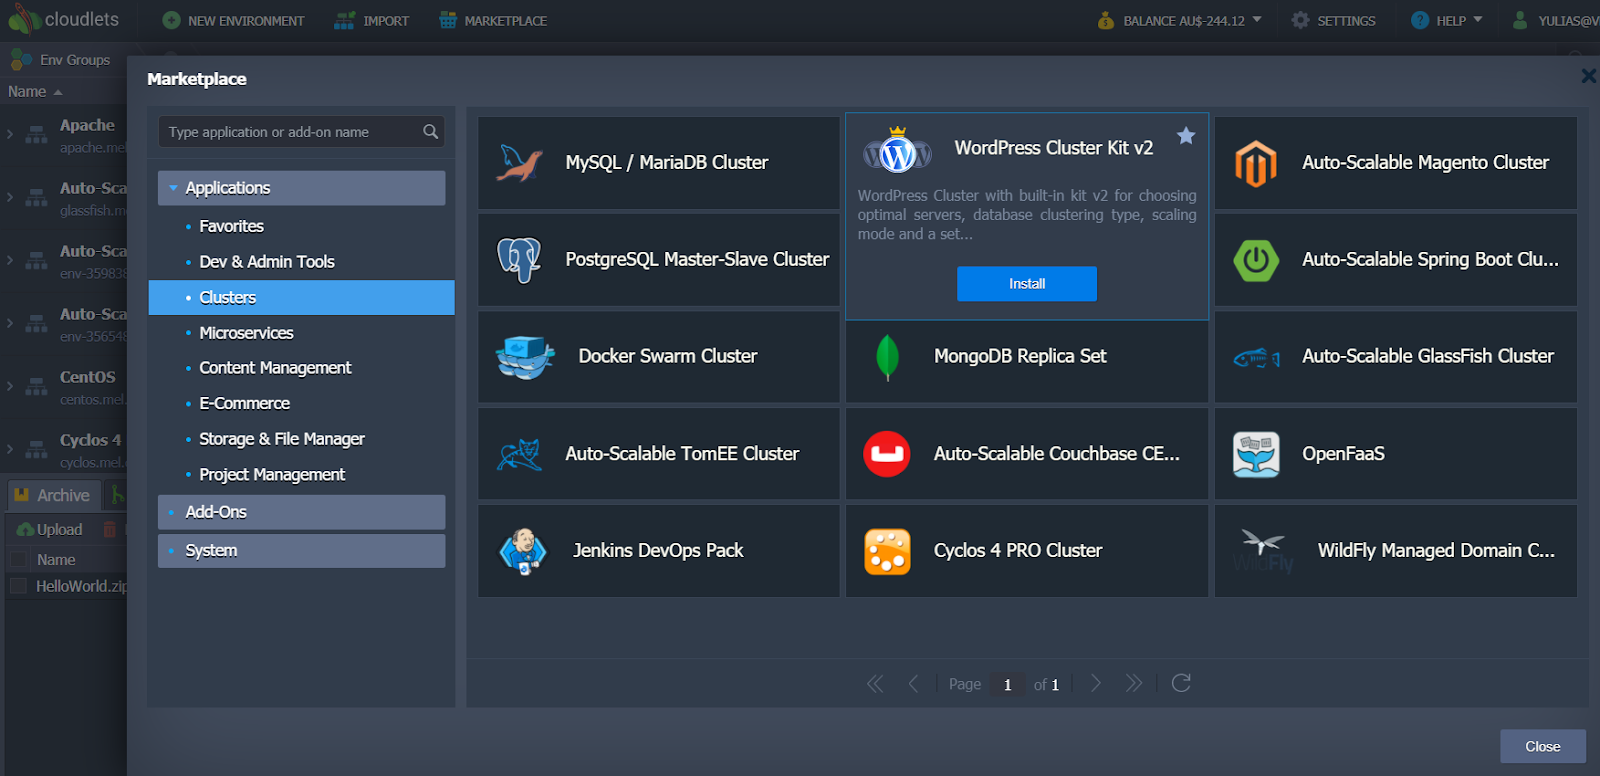
2. Open the Marketplace and choose WordPress Cluster Kit v2.
3. Customize the installation details, choose the scaling strategy (it set to Low Load by default) if needed within the opened installation window.
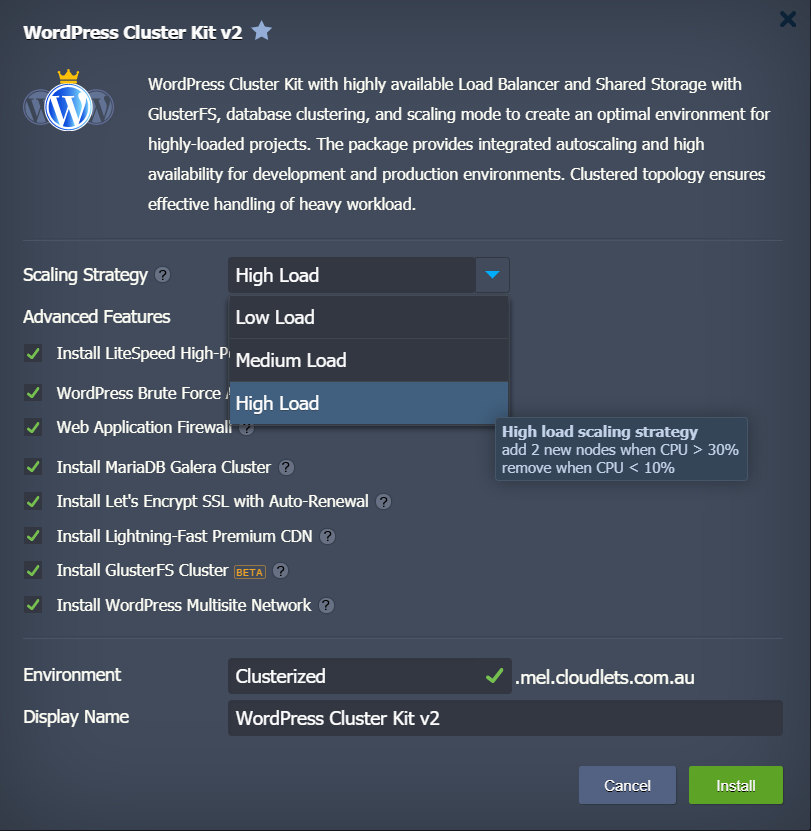
- Install LiteSpeed High Performed Web server - if this option is disabled, the cluster will be installed using NGINX load balancer and application servers.
NOTE: LiteSpeed web server is available for installation only for billing customers. In case you’d like to test it during trial period please contact support@cloudlets.com.au
- WordPress Brute Force Attack Protection - secure WordPress admin panel that limits failed login attempts. Default action is Throttle and number of allowed attempts is 100.
- Web Application Firewall - protects web sites with LiteSpeed built-in WAF based on Free ModSecurity Rules from Comodo.
- MariaDB Galera Cluster installation requires running on InnoDB storage engine as well as the necessity to have a primary key. When using the Galera Cluster, you can perform direct read and write operations to any node. If any single instance goes down, there will be no cluster downtime and no complex failover procedures.
- Let’s Encrypt SSL with auto renewal simplifies and automates the process of issuing, configuring and updating trusted custom SSL certificates.
- Lightning Fast-Premium CDN - powered by Jelastic Cloudlets Platform’ CDN is an HTTP/3 premium content delivery network of 160+ Super PoPs (points of presence) with bandwidth capacity up to 115 Tbps, advanced caching and acceleration strategies based on best-in-class IP Anycast technology.
- GlusterFS Cluster is a shared storage auto-clustering that provides a fault-tolerant distributed file system with automatic data synchronization across the cluster nodes.
- WordPress MultiSite Network is a type of WordPress installation that allows to create and manage a network of multiple websites from a single WordPress dashboard.
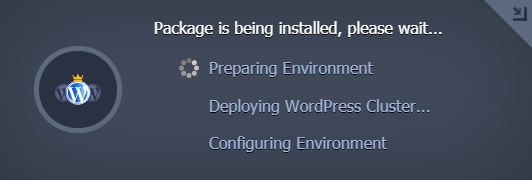
4. Name your environment and click Install. Wait for a couple of minutes for Cloudlets to set up your WordPress Cluster.
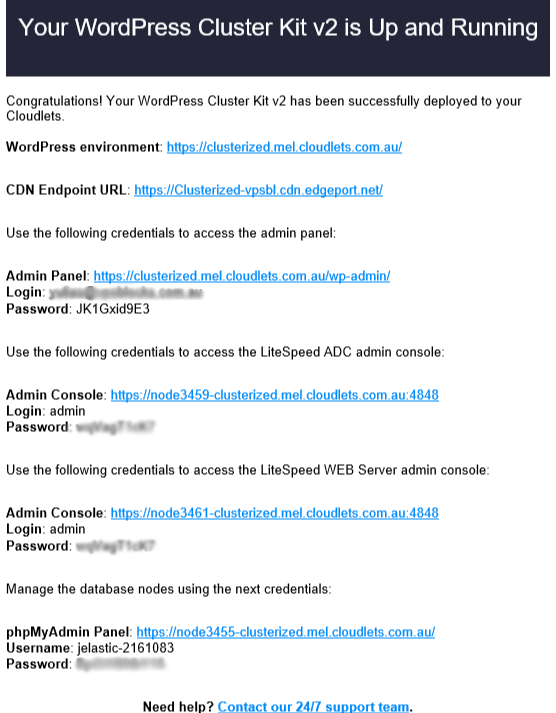
5. The system will send you the install confirmation email with the link and credentials essential to manage your WordPress application.
Domain and SSL Certificate Configurations
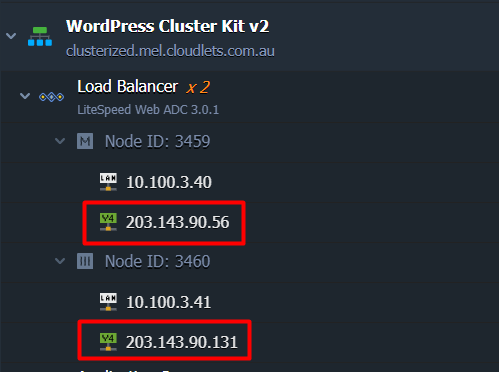
For running in production, your clusterized environment should have a public IP address and custom domain.
In case of installing WordPress with Let’s Encrypt SSL add-on, the public IP address will be added to the Load Balancer node automatically.
Now let’s bind a custom domain to our clusterized environment and issue a trusted SSL certificate for it.
1. Create an A record for your custom domain that will map it to the public IP address attached to Load Balancer (as our cluster contains 2 LiteSpeed nodes, we’ll create two A records for each IP address).

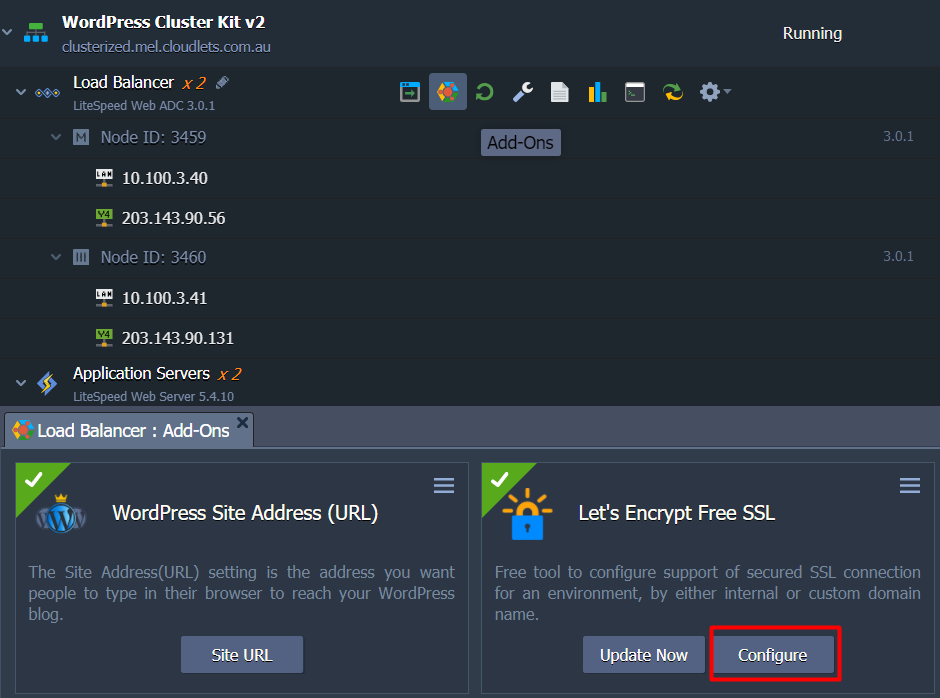
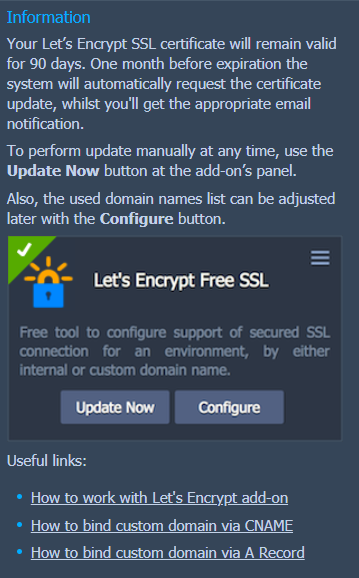
2. Then find the Let’s Encrypt Free SSL among the Load Balancer Add-Ons and click the Configure button.
3. Paste your custom domain (in our case its clusterized.cloudlets.pp.ua) in the respective field and click Apply.
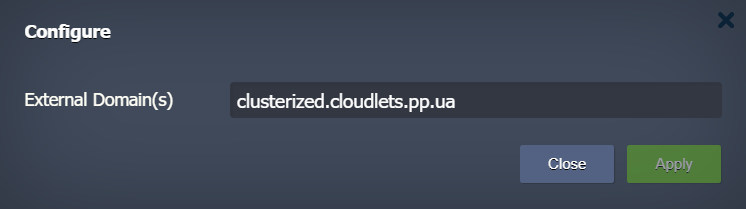
In several seconds your SSL certificate will be issued, - you will be informed via popup and email.
4. Now let’s open the WordPress admin panel using the link and credentials from the respective email.
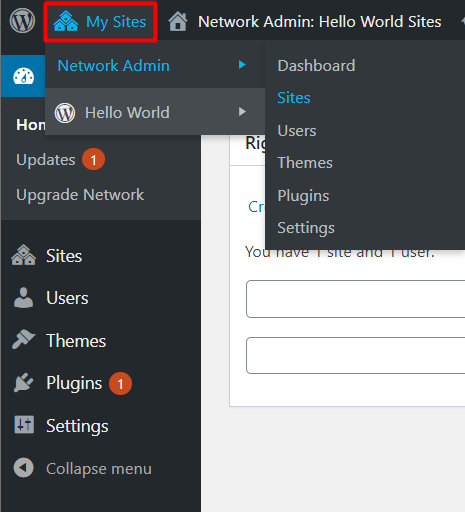
Open My Sites > Network Admin > Sites page.
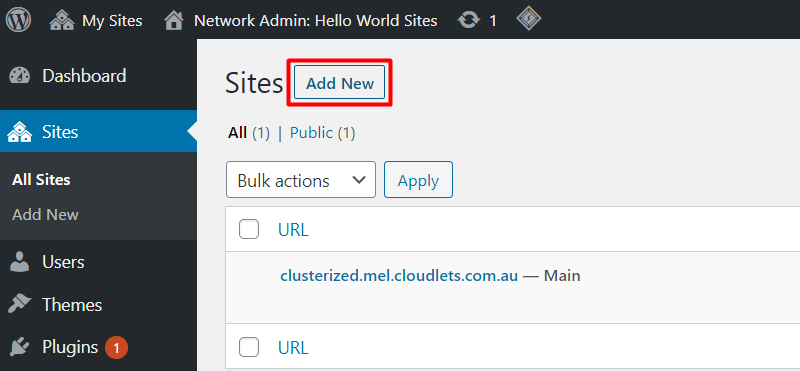
This is the page with all sites of your WordPress Multisite Network. Now, there is the main site only created by default. Click on Add New.
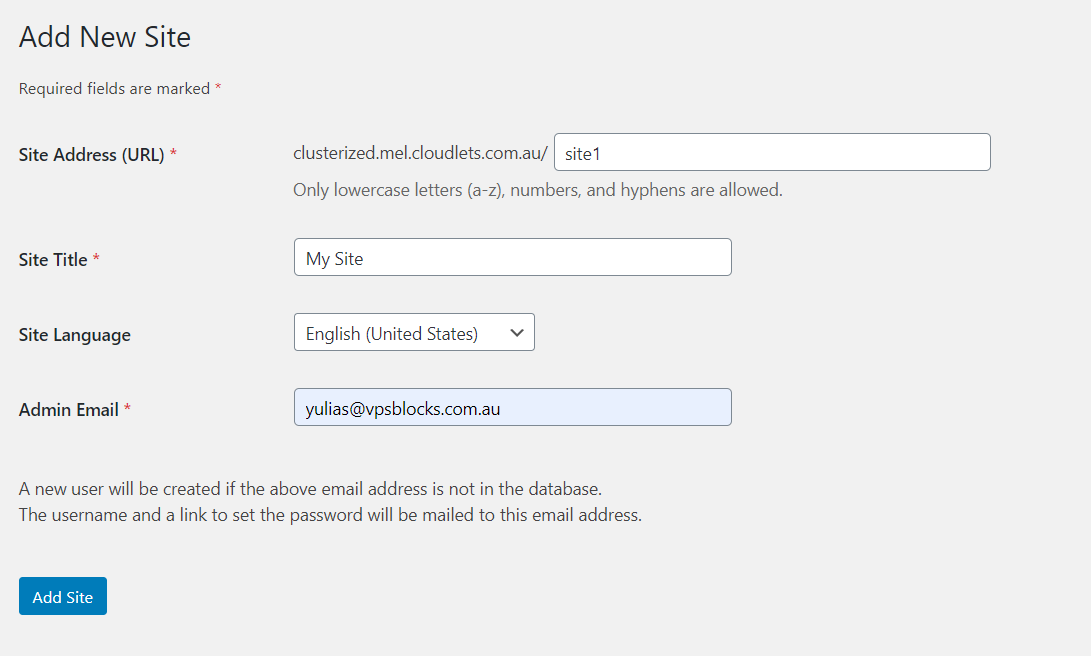
Fill out the form specifying the Site Address (URL), Title, Language and Admin Email. Click on Add Site.
You have created and configured the first website within your WordPress Multisite Network. Repeat the same steps to create additional sites when required.
Bind Custom Domains to Websites in the Network
Go back to the list of the available sites and click on Edit next to the required one. Change the Site Address (URL) with a custom domain:
https://clusterized.mel.cloudlets.com.au/site1 => https://clusterized.cloudlets.pp.ua
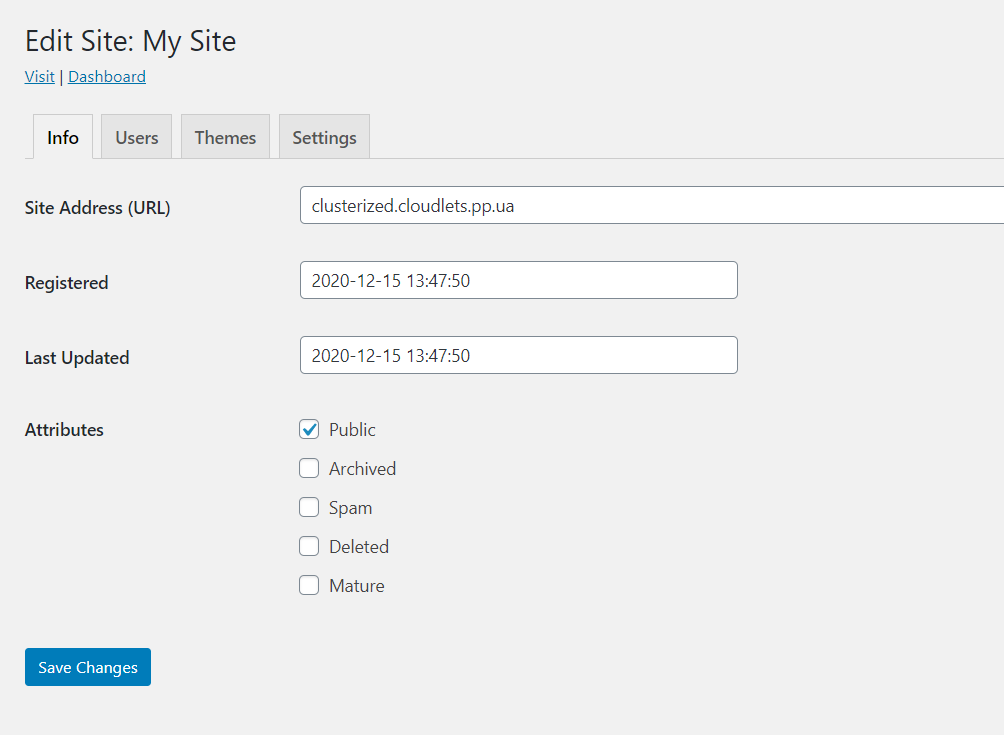
Press Save Changes. Repeat the same steps to bind domains for each required sub-site.
Enable CDN for Websites in the Network
In this step you have to bind a CDN endpoint to each site of the created network.
- Enter the dashboard of each site by clicking on the Dashboard menu item.

2. Press LiteSpeed Cache and go to the CDN tab.
3. Paste the CDN URL from installation email.
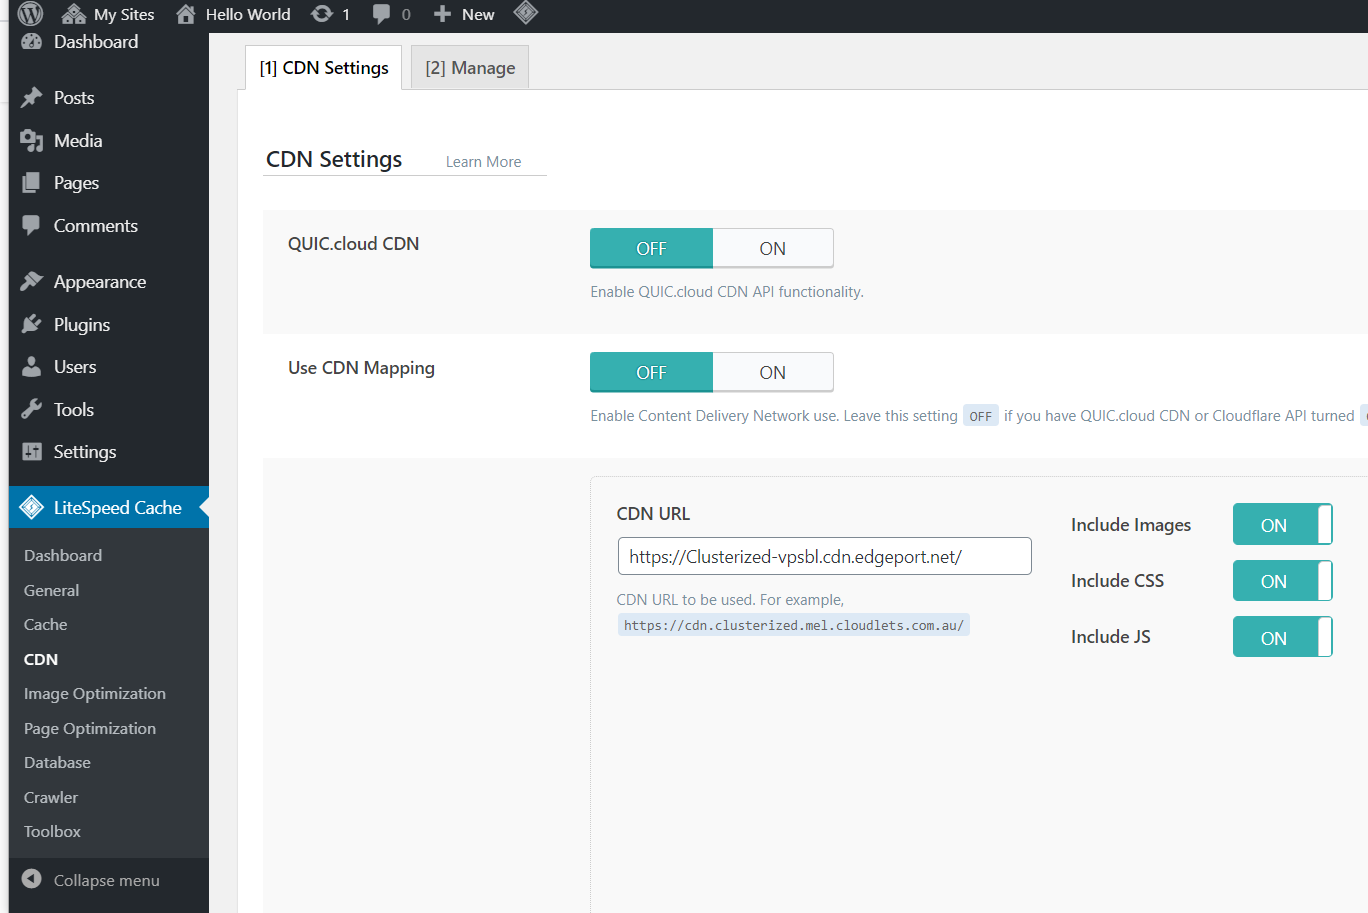
and website Original URL (domain you previously bound, in this format: //clusterized.cloudlets.pp.ua).

4. Click Save Changes.
Repeat the same steps for each site in the network to bind a CDN.
That’s all!
Your WordPress multisite network is configured inside a highly-available cluster, and sub-site(s) are created with custom domains and enhanced by enterprise-level CDN.
Install your own multisite WordPress cluster at Cloudlets Australia and handle unexpected load spikes or permanent high load, ensure zero downtime, improve performance and response time, cut maintenance costs, as well as easily manage all the websites in your network from a single dashboard.