Choosing the cloud hosting platform oftenly depends on its functionality, ease of use, pricing and cost efficiency.
Local data center and tech support are crucial, providing higher availability and individual approach over the global giants.
Cloudlets Australia is a cloud hosting platform that is powered by Jelastic, and supports all the popular programming languages (PHP, Java, Ruby, Node.js, .NET, Go), application containers (Docker and Kubernetes) as well as Software Stacks.
Within this overview article we are going to unleash the main peculiarities of Java support within the Cloudlets Australia web hosting platform.
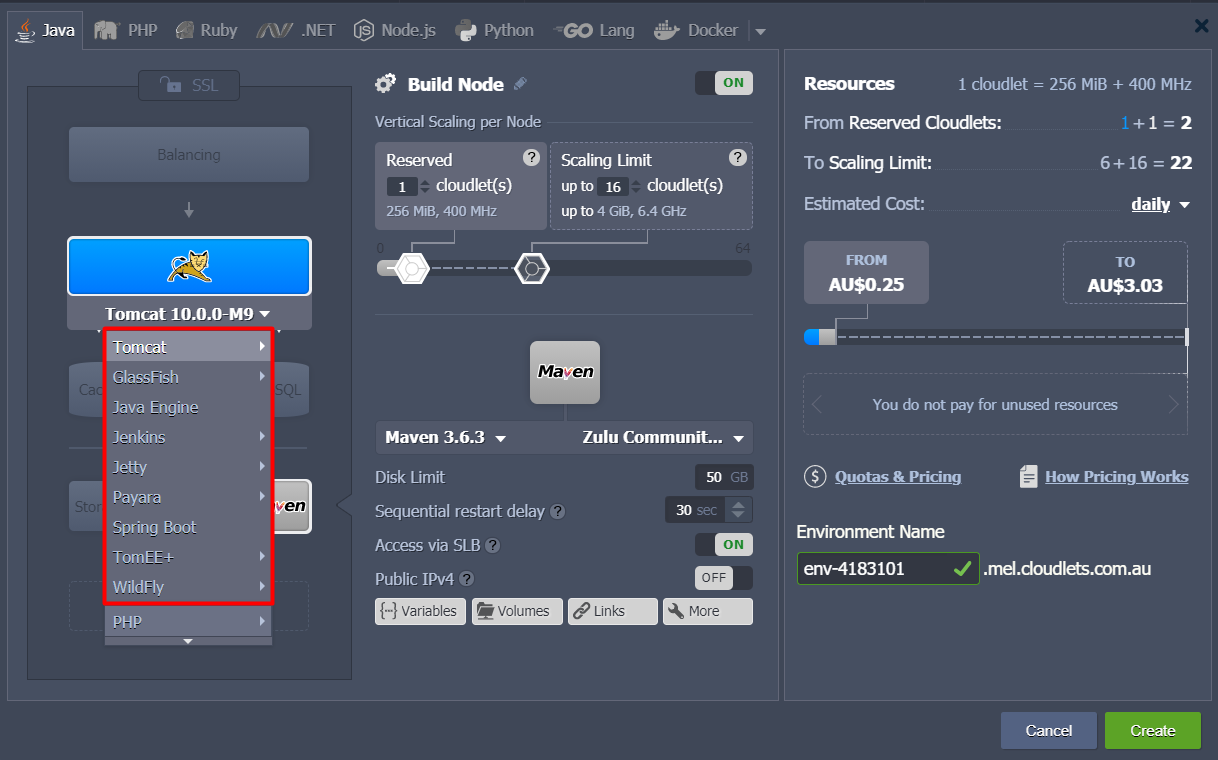
The Cloudlets platform allows creation of containers utilising many JAVA engines:
- Tomcat versions from 7.0.x to 10.0
- GlassFish 5.0 - 6.0
- JAVA Engine
- Jetty
- Payara 4 and 5
- Spring Boot
- TomEE from 7 to 9
- WildFly from 19 to 21
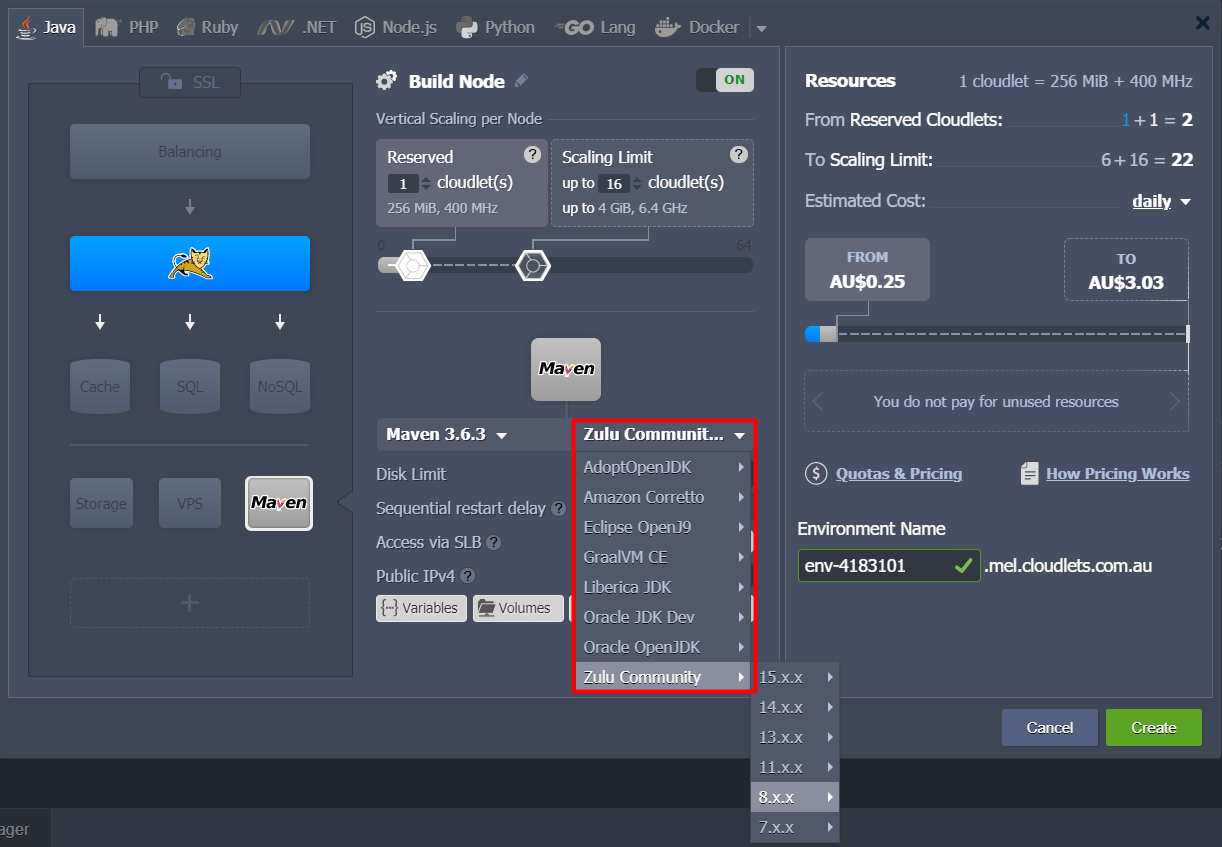
Each JAVA engine supports numerous JDKs, they are listed below
- Adopt Open JDK
- Amazon Corretto
- Eclipse OpenJ9
- Liberica JDK
- Oracle JDK Dev
- Oracle OpenJDK
- Zulu Community
- Zulu JDK
Environment Flexibility
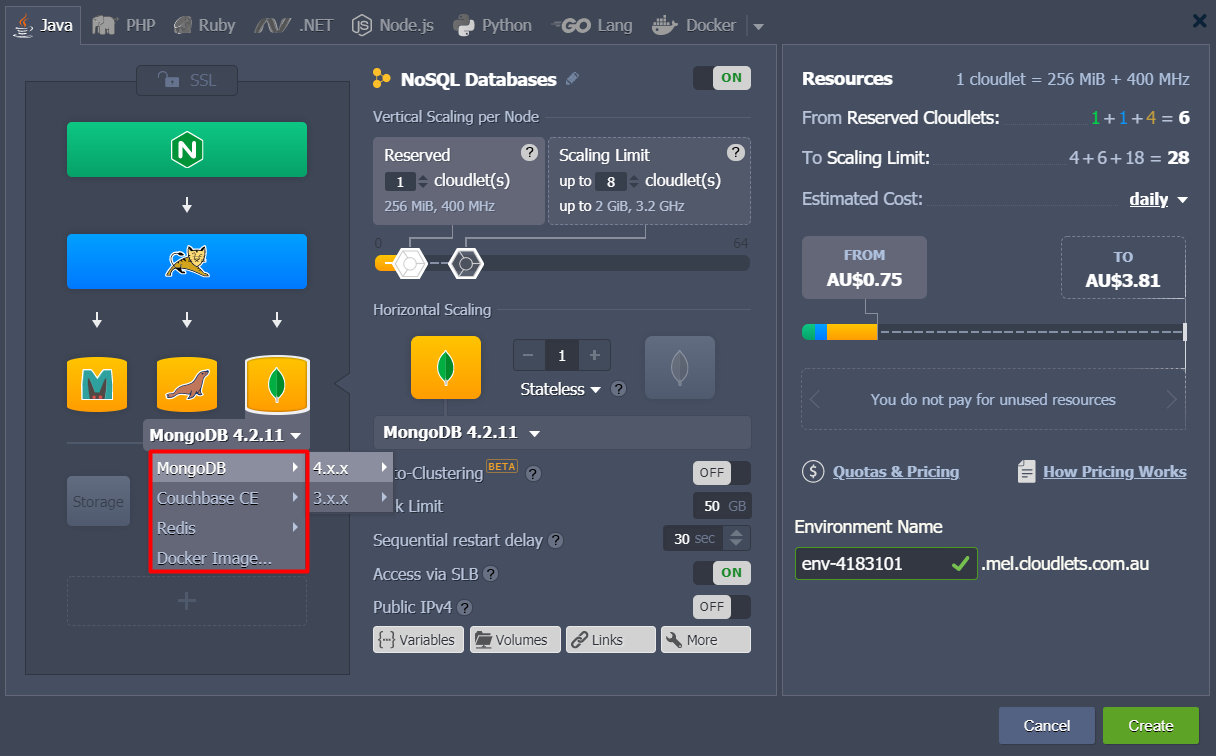
Within the Cloudlets hosting platform you can create an environment around your JAVA container from a simple attached MySQL database, to a load balanced cluster.
Some of the features include:
- Nginx, Apache Balancer, HAProxy or Varnish load balancing.

- Memcached for caching

- MariaDB, MySQL CE, Percona or PostgreSQL for SQL databases

- MongoDB, Couchbase CE or Redis for flat file databases.
Integration with Docker allows to run a docker container and install any application from the docker hub.
- All containers in an environment have an internal IP address and internal traffic is FREE.
One-click Installs
As well as providing a ready-to-go JAVA environment customised with your selected engine and JDK, there are a selection of one-click environment installations available in our free marketplace. These include:
- Gitblit
- Rocket.chat
- Magnolia CMS
- OpenCms
- Alfresco
- XWiki
- Ametys CMS
- Liferay
- Cyclos 3 CE
- Cyclos 4 Pro
Cloudlets provides a Free Trial for 14 days, so that you can properly test your JAVA application on cloudlets without spending a cent. And the credit card is not required for the registration.
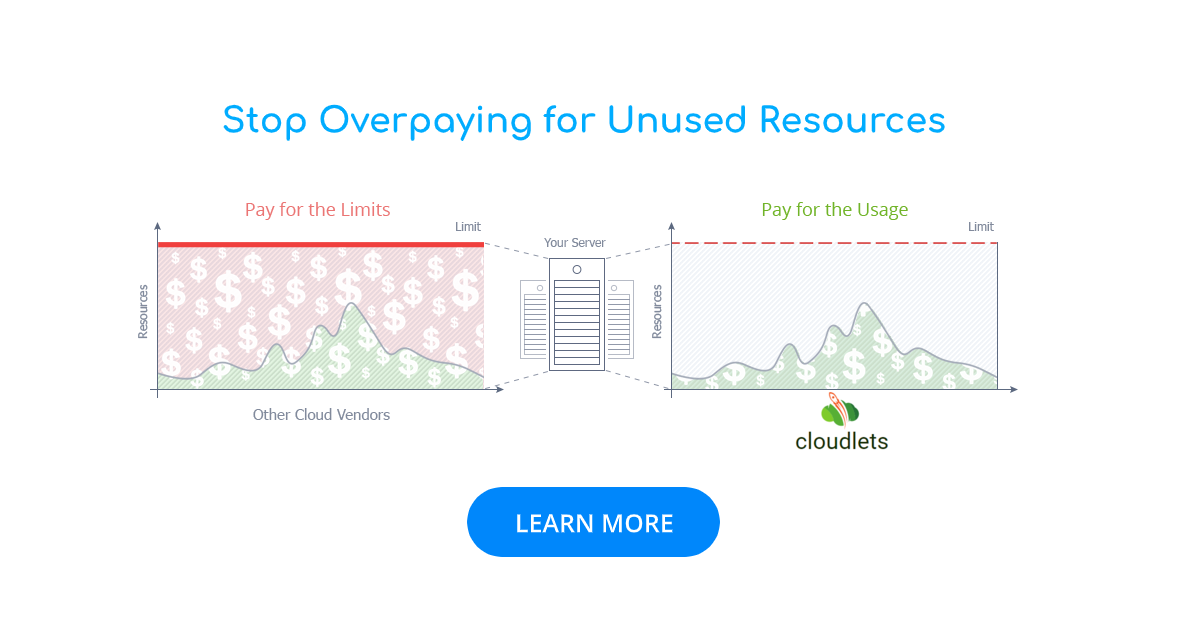
Combating Scrapers and Heavy Load Events: let’s imagine a case when scrapers hit your application causing hundreds of requests per second and as a result it would slow to a crawl or stop working at all. All you need is an infrastructure to be able to handle it. With dynamic cloudlets you have access to extra resources on the fly whenever your app requires them without you doing anything. Cloudlets just handles it for you.
Instead of losing business by being offline, you just use the extra resources and pay for them only when your app actually requires them.
How to Create Java Environment
To host a Java application, you need to create an appropriate environment. Just open the topology wizard in your Cloudlets dashboard, navigate to the Java language tab, pick the desired Java application server, databases, and other stacks. If needed, customize settings (such as cloudlets, disk space, region, etc.) and click Create.
Cloudlets provides easy installation of all the popular #JAVA environments and many JDKs. Check out how easy it is to create your Java project in a click https://t.co/3WYOsd5r8p @AustralianJava @melbjvm @australianit pic.twitter.com/OiYMjzNeFZ
— Cloudlets.com.au (@CloudletsAu) January 28, 2021
All added servers represent fully isolated containers providing more availability, while isolation eliminates the risks of interfering with one another. You can attach the Public IP address to any of these servers for being accessed directly. Otherwise (i.e. if using default settings), the incoming requests sent to your application will be proxied by Shared Load Balancer.
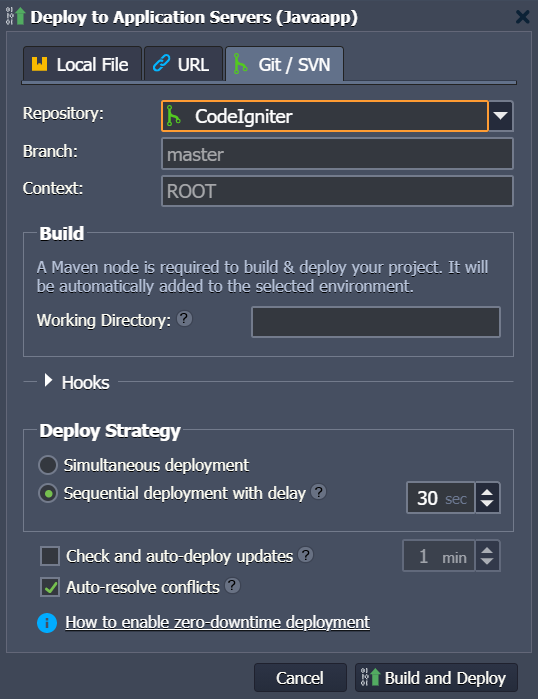
Java Application Deployment
After environment creation, you can deploy your Java application. The platform makes the deployment process automated, so that your project is up and running effortlessly.
The supported deployment methods are:
- via the application archive - .war, .zip, .ear archives
- from the GIT/SVN remote repository, using the Maven build node
- using plugins - Ant Task, Eclipse, IntelliJ IDEA, Maven and NetBeans
Java Domains Management
You can bind a custom domain name to your application’s URL and use it instead of the default environment domain:
- CNAME redirect if using Shared Load Balancer (recommended for dev and test environments)
- DNS A Record if using public IP (as it can handle high traffic load, more suitable for production environments)
The swap domains feature (or the SwapExtIps API/CLI method) enables you to upgrade and modify your application with zero downtime without interruption.
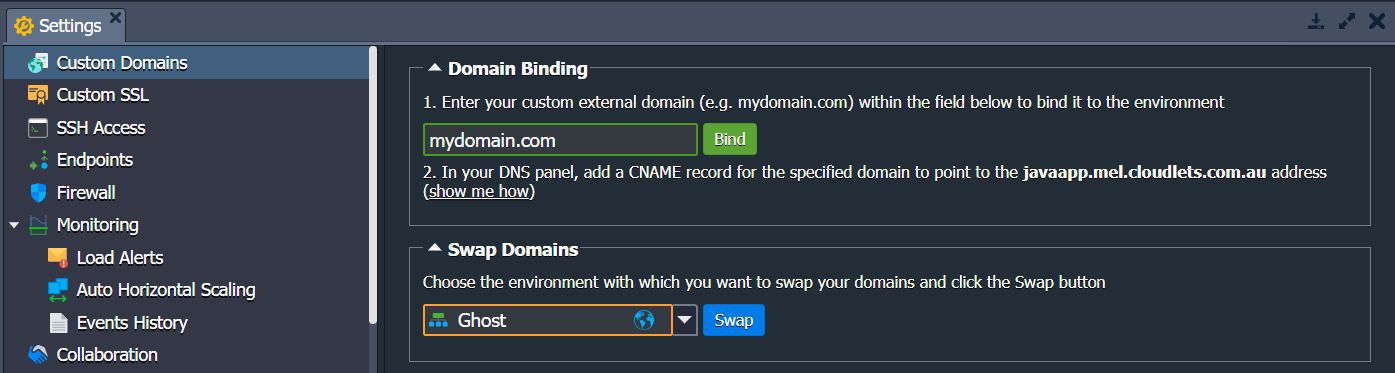
The platform allows to use multiple domains within a single environment in order to increase its usability, efficiency, and scalability, at the same time saving costs (avoiding a need to set up separate instances for different apps).
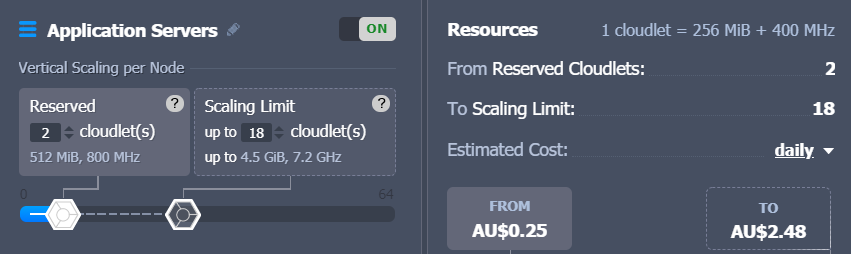
Vertical Auto Scaling
The cloud platform dynamically provides the number of cloudlets (i.e. RAM and CPU resources), required by your project for current load handling. To enable auto scaling specify the maximum limit, all the else will be performed by the platform automatically. Automatic vertical scaling ensures that you never overpay for unused capacities.
To customize the vertical scaling limit, use the slider within the topology wizard:
Horizontal Scaling
When your project becomes highly popular, and it requires more than just one single node, you can scale it horizontally. Ensuring high availability and reliability, all the newly added nodes are created on the different hardware nodes.

To set up the horizontal auto scaling just click the +/- buttons within the Horizontal Scaling section of the topology wizard to set the required number of nodes (load balancer will be added automatically).
It is also possible to adjust the preferred scaling mode:
- Stateless - simultaneously creates all new nodes from the base image template
- Stateful - sequentially copies file system of the master container into the new nodes
It is possible to set up horizontal scaling not only manually but also automatically (based on the current load on the node, which is monitored through the tunable triggers).
There are five different types of resources, which are monitored by triggers:
- CPU
- Memory (RAM)
- Network
- Disk I/O
- Disk IOPS
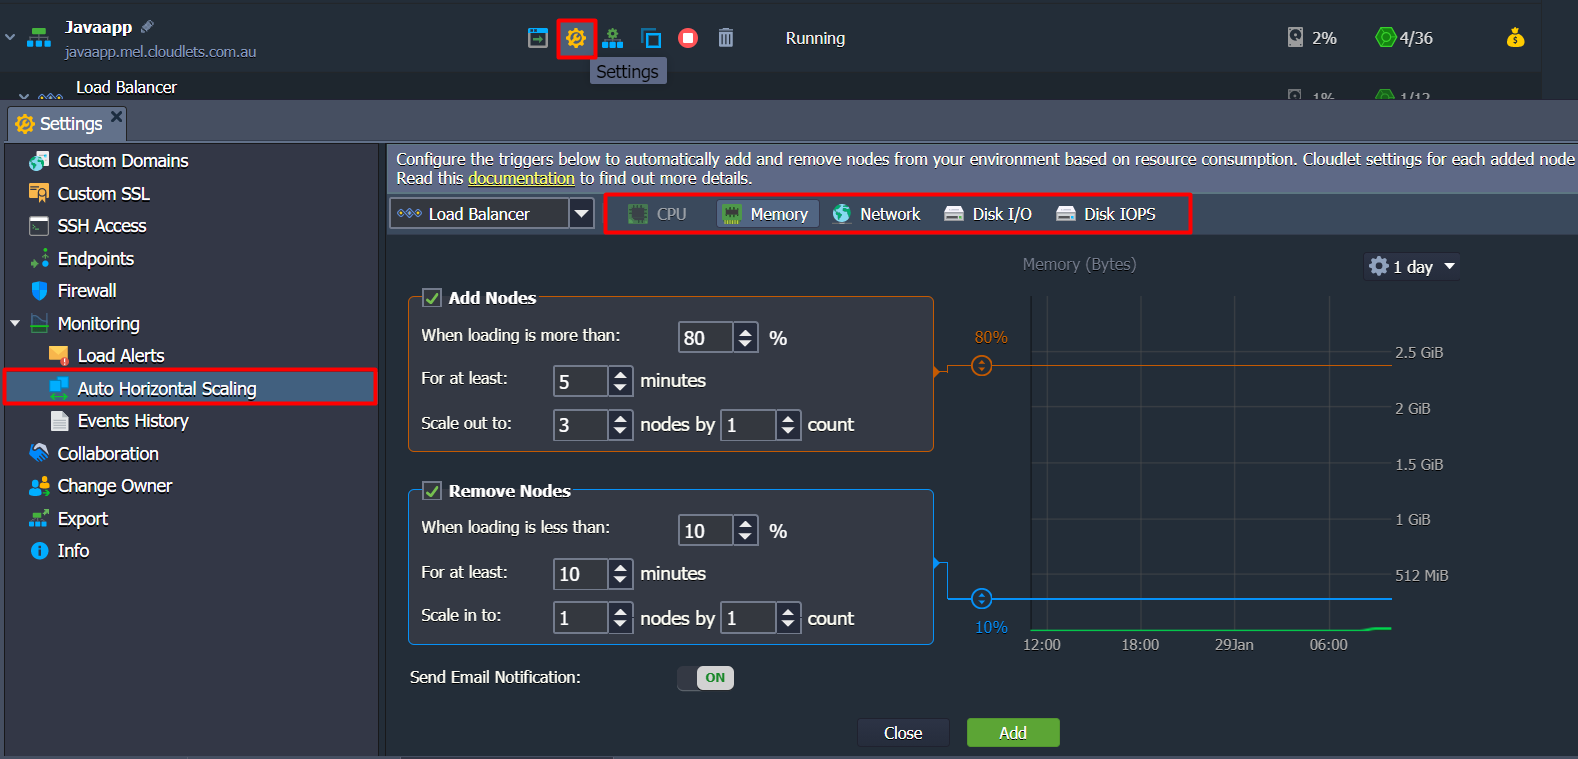
The trigger starts monitoring the resource consumption immediately after addition, and when the usage level exceeds the stated limit, a trigger becomes invoked. Subsequently, if the load persists for a defined period, it will be executed, adjusting the number of nodes.
We are ready to meet your needs.
Cloudlets support team is ready to help you with any advice you may need in setting up and configuring your environment. Please don't hesitate to reach out to us. Our mission is to provide you with a service that not only outperforms competitors but costs you less.