
SSH or Secure Shell is a cryptographic network protocol for operating network services securely over an unsecured network. It is also used to transfer files.
Cloudlets platform supports access via SSH via:
- Web SSH that provides an access to a separate node within your environment, which is based on the user’s session. However, you cannot transfer files using the Web SSH.
- Putty SSH access through the Jelastic SSH Gate based on an SSH key pair you generate, allows access to either whole account or just a particular container.
Let's learn on practice how to access your cloud environment via SSH at Cloudlets Australia platform.
Public SSH key creation
- Let's create (or use the existing) your test environment in the cloud (Login or register to the dashboard, click New Environment).
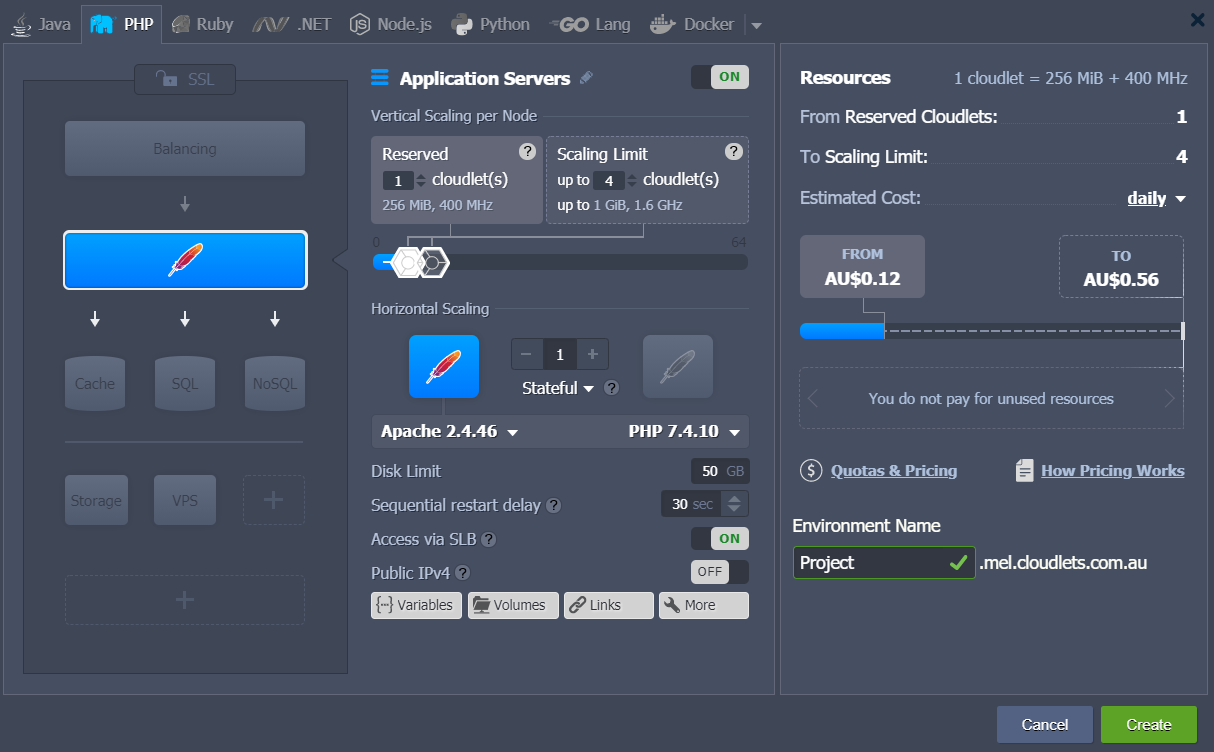
2. After the project is created - click the Settings icon.
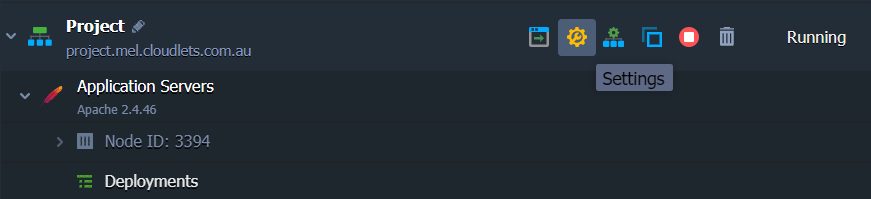
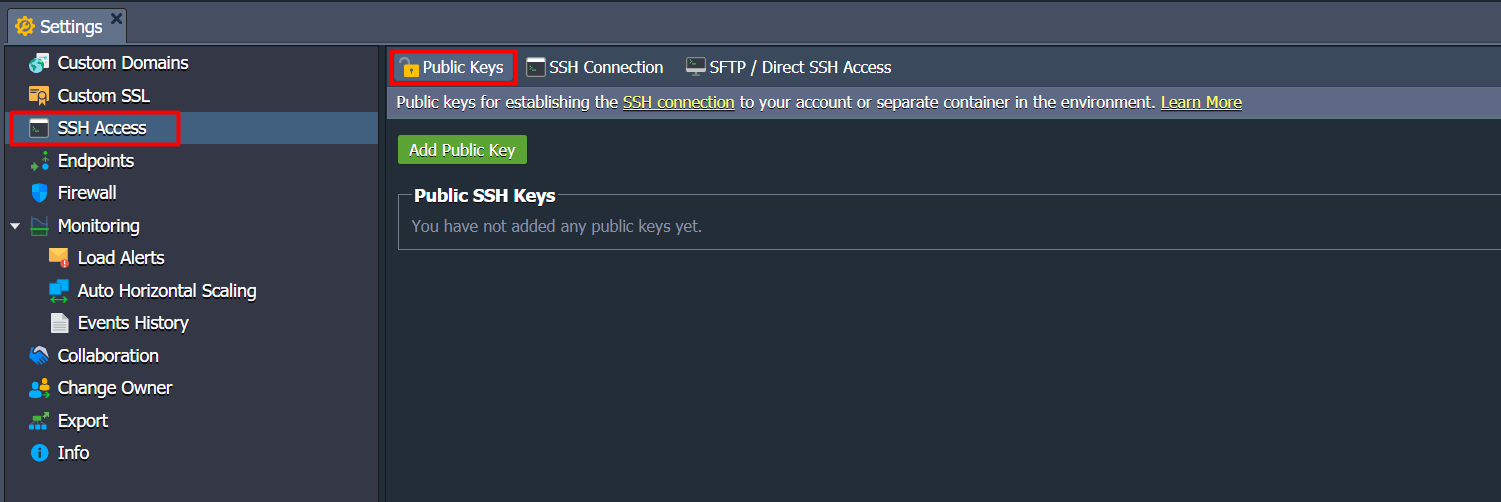
3. In the opened Settings window, go to SSH Access section. Click Public Keys and then Add Public Key.
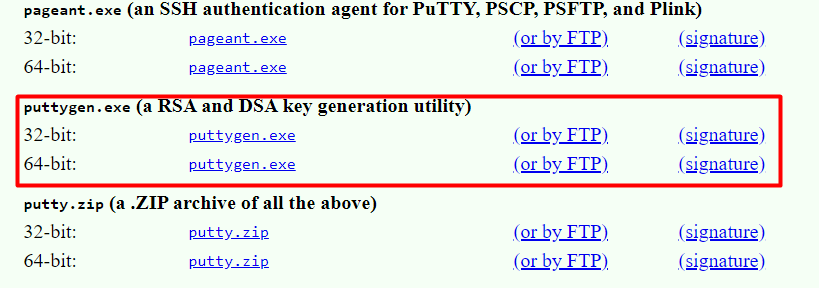
Now let's check the steps of generating an SSH key on your Windows machine.
4. Download and run PuTTYgen, SSH keygen tool:
5. Specify the following parameters:
- choose the RSA key type

- Click Key section and choose SSH-2 RSA key
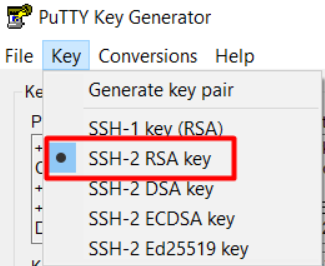
Note: by default the number of bits in a generated key is 2048, but it can be changed if needed.
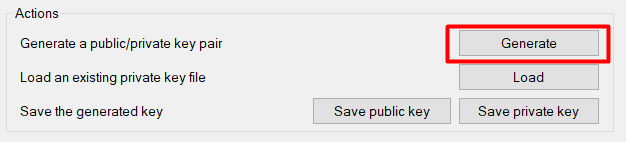
- Click Generate.
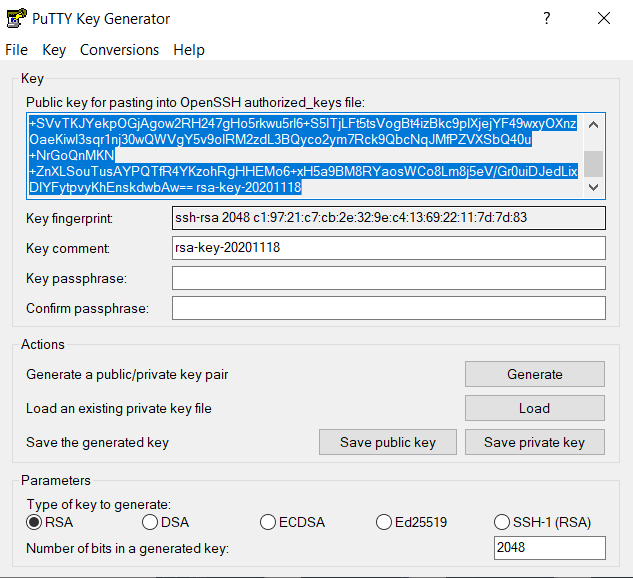
6. Now, you can:
- Get the public key for SSH access to your account via local client - copy the generated key from the output field at the top of the window
And paste it to the corresponding field
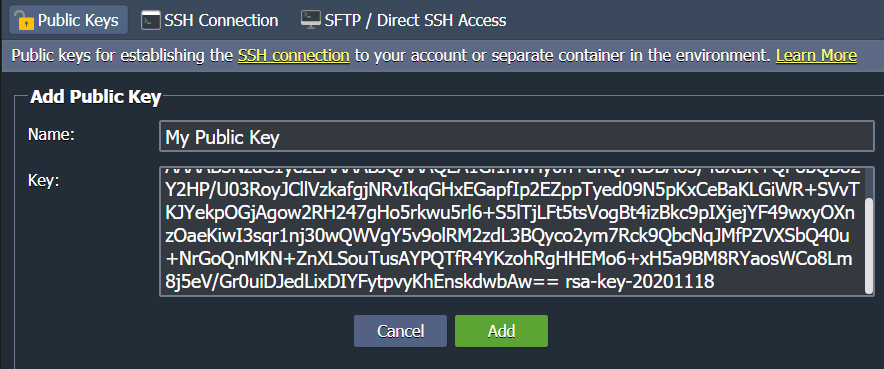
Type the name for your key, click Add.

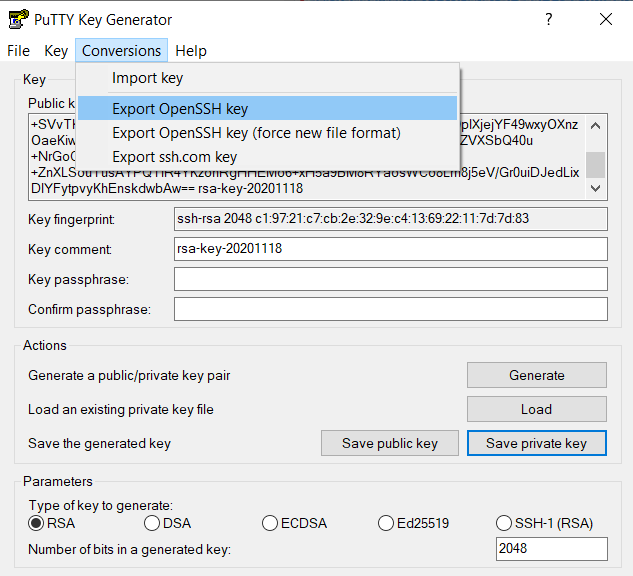
- If you are using GIT repositories or similar, it is also possible to get the private key for authentication at your remote GIT repository via SSH. Click the Conversions section and select the Export OpenSSH key option to convert the private key to the GIT format required.
Establish the SSH connection on Windows
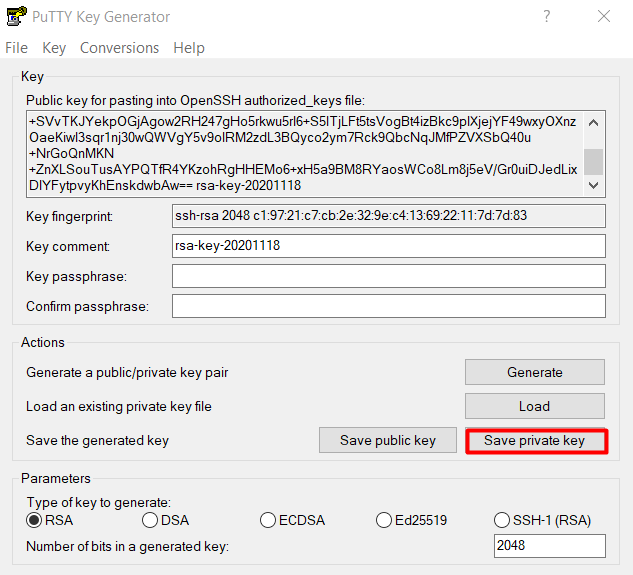
Firstly, you need to save the private key on your local machine which corresponds to the public one, previously added to the dashboard. Then just perform the next steps:
1. Save a private version of your SSH key if you didn't in the previous step.
2. Download and run Pageant PuTTY SSH agent

In the opened window click Add key button and navigate to your local file with private SSH key.
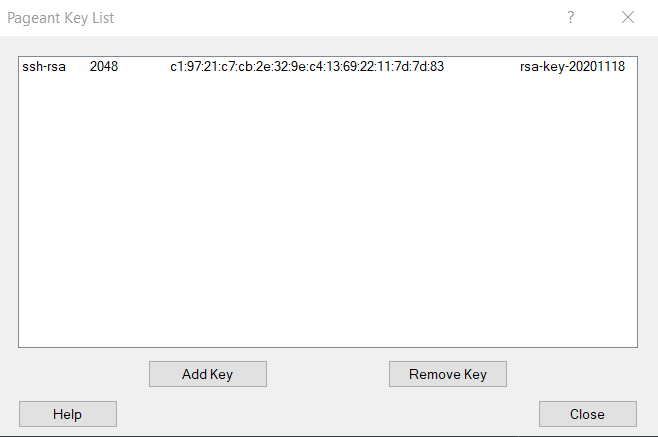
3. Click the Close button - now Pageant will be rolled to the tray. Ensure to not exit this tool until your SSH session is closing, as you'll loose a connection in such a case.
Accessing your environment via SSH
Click SSH Connection in Settings menu.
Take not of the SSH access details provided in the connection. You will need this to access the container.

4. Now let's download and run PuTTY
5. Navigate to the Session tab. Fill in the Host Name (or IP address) field with your SSH connection string, that can be seen in the Settings > SSH Access tab at the dashboard. Also specify 3022 Port number.
Select the Open button.

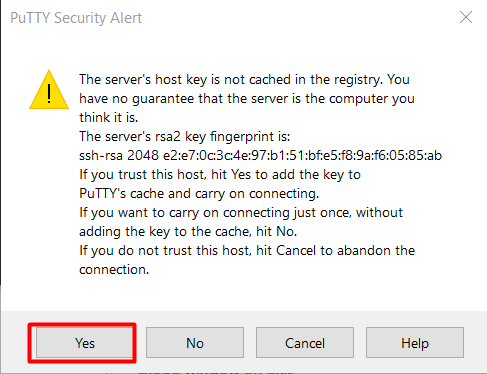
Whilst accessing the SSH connection for the first time, you will see the security alert window. Click Yes to proceed with connection.
6. That's all! In the opened console you'll see a list of all the available environments in your account (and our earlier created project can be seen under the 20th number).

Accessing the container via SFTP protocol
To access a necessary container via SFTP protocol, you need to have a private key on your local machine which corresponds to the public SSH key previously added to the Cloudlets dashboard.
Private key is saved automatically while working on Linux and MacOS. And in case of using Windows you have to additionally save the private key (we've already done this several steps ago) which corresponds to your public SSH key.
So let's now run the FTP-client with SFTP protocol support. In this case we'll use WinSCP as an example.
- Download WinSCP at https://winscp.net/download/WinSCP-5.17.8-Setup.exe then install and run it.
- In the opened window click New Site, paste the Host name, Port number, User name and Password (if you've created it). Click Login.

3. In a few seconds the connection to both file and data storage directory will be opened.
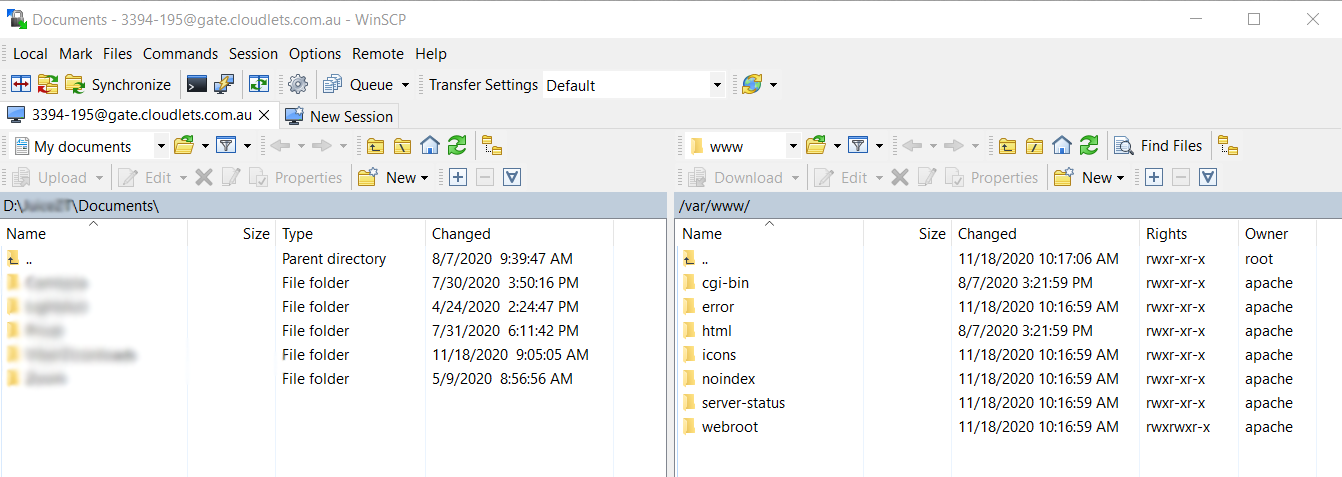
Pretty easy, isn't it? Now you can manage and transfer your app’s files via the secure channel.
Direct SSH access to the container
Cloudlets platform also lets you access directly to the necessary container (eliminating the necessity of choosing an appropriate environment and node).
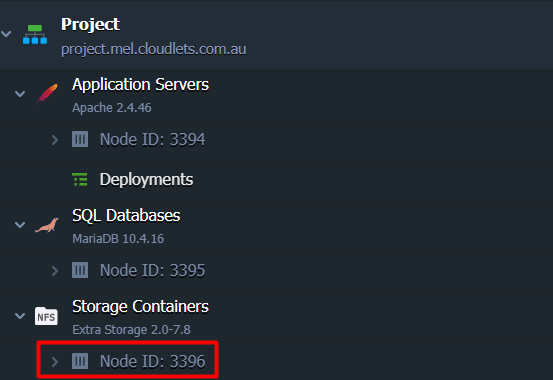
For this, you have to know the required container ID - you can check it in the dashboard:
Or you can use the previously described method of SSH access from the console - just enter the required environment number (20 in our case) to dive into the detailed information.
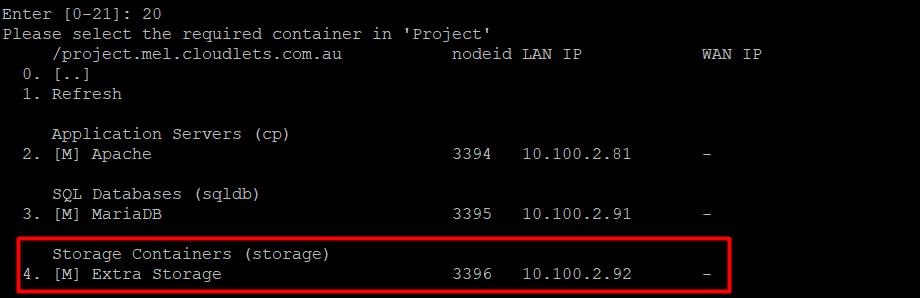
Use the nodeid value of the required container in the command of the following type:
ssh {nodeid}-{uid}@{SSH_gateway} -p 3022
In our case it will be ssh 195@gate.cloudlets.com.au -p 3022 and our node ID is 3396.
For example, in order to access an Extra Storage Container - all we need to do is simply enter the command: ssh 3396-195@gate.cloudlets.com.au -p 3022
You can use this option whilst working with tools for deployment and setting up configurations at the remote container.
Would like to try how it works on your machine? Simply register at https://app.cloudlets.com.au/ and get 14 days free to test the scalable cloud hosting platform.