
Security, hosting reliability, flexibility - the main reasons developers choose VPS hosting. At the same time, hosting a virtual private server requires a manual configuration of the hosted application. One more thing to consider is scaling whilst the app growth, as you'll need to keep a service operable and assigned with the required amount of hosting resources.
Cloudlets Australia managed all these issues with the help of integrated Elastic VPS stacks on top the different OS types - CentOS, Ubuntu, Debian.
Check out the reasons of choosing Elastic VPS in the cloud:
- insulation - each VPS represents an independent instance, accessible only via dedicated public IP. It means that any other account on the hardware cannot influence it
- full control - makes possible to manage a virtual server in any preferred way due to the provided root permissions
- scalability - you can automatically scale your server (vertically and horizontally) via easy set up of the resource limits and special triggers
- cost-effectiveness - VPS appears to be a quite cheap solution (comparing to the cost of purchase and maintenance of a real dedicated physical server) due to the usage-based pricing model
- management tools - access to the platform inbuilt tools for simplified configuration via the GUI dashboard
Alltogether it provides you with an advanced instance that can handle big applications with high load and ensures their easy administration and management.
Now let's check how it is possible to install your VPS in the cloud.
- Sign in (or register - it is absolutely free and you don't have to provide your credit card details) at https://app.cloudlets.com.au/

2. Click New Environment in the dashboard

3. Click on the VPS section at the bottom left corner and choose the needed VPS (CentOS 7.7 in our example) from the expandable options list
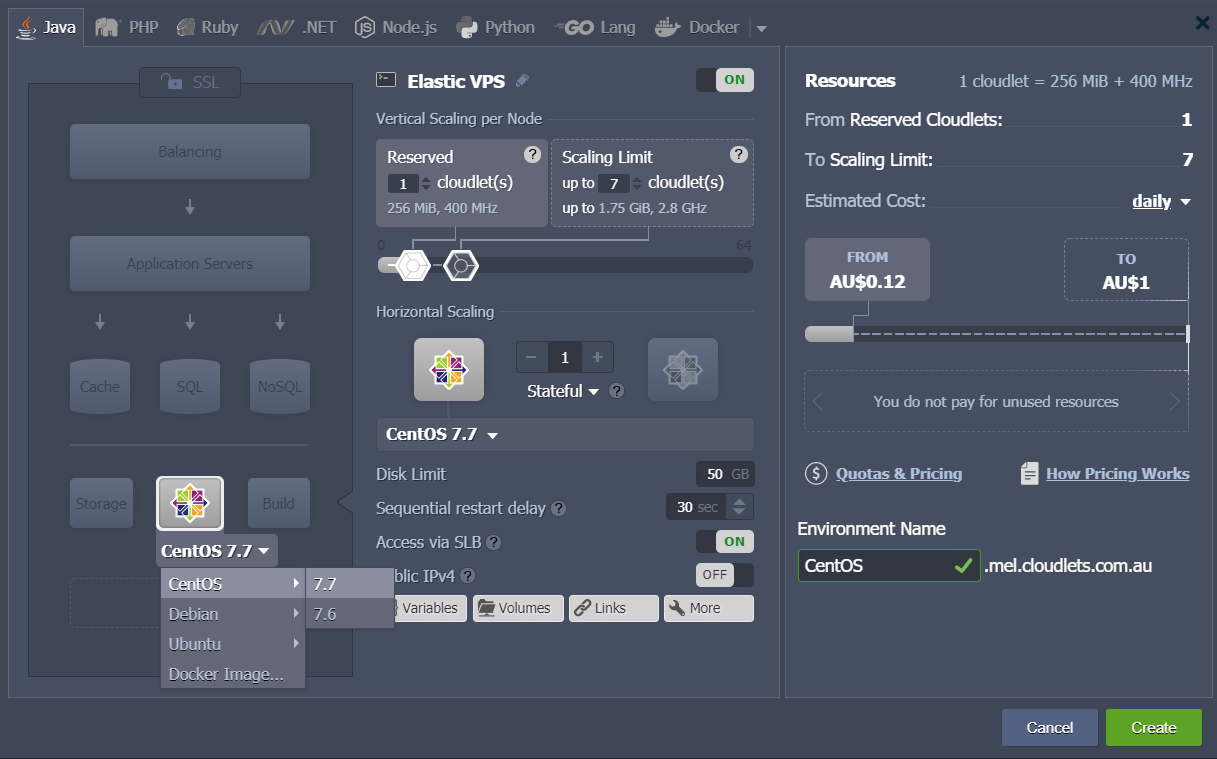
Note: When enabling VPS of any type, you’ll automatically get the Public IP address(es) attached to the corresponding node (one per instance).
To scale your environment, you need to increase/decrease the maximum number of available resources (cloudlets) by adjusting the cloudlet sliders in the Vertical Scaling per Node section.
Specify cloudlet limits for this node, scale it out (if required), type the name of the environment, click Create.
4. In a couple of minutes, your new environment with the chosen virtual server will appear at the dashboard. You’ll also receive an email notification with its administration data (i.e. login/password credentials, attached Public IP and access URL).
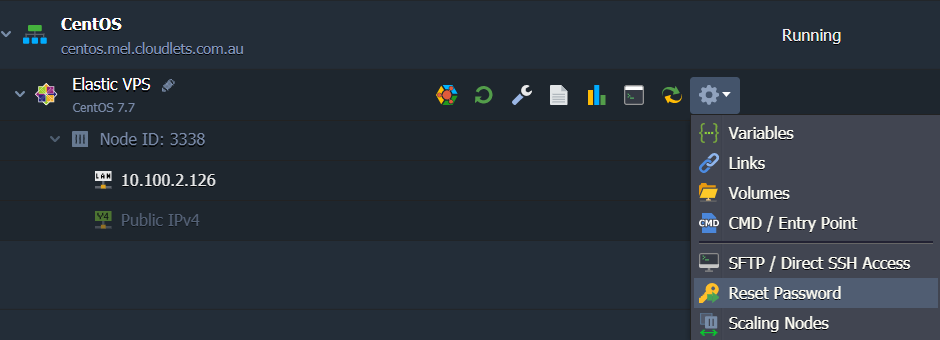
Also, you can view the Public IP address directly in the dashboard. If you’ve lost access to your VPS server or want to change the admin credentials for it, click the Reset Password button as it is shown in the image above.
Try it for free and handle applications with high load and simultaneously ensure their simple administration with certified elastic virtual private servers on top of CentOS, Debian, Ubuntu operating systems provided within Cloudlets Australia.